bonnenuit
Why do I always have to be Captain?
- Joined
- Dec 22, 2015
- Messages
- 3,977
Follow along with the video below to see how to install our site as a web app on your home screen.
Note: This feature may not be available in some browsers.
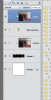
Maureen - maybe you need to rasterize the Text in PSE? I'm not sure.@jenn mccabe Jenn for the life of me I cannot figure out what is going wrong with mine. I used to do this all the time. Once i get to the stage shown in the image below, I only see the original photo masked onto the shape. Can you see anything wrong?? btw, PSE15
Also - from your layers palette shot - I can't see exactly where your type is in relation to the mask. Make sure your typed text is not over the top of the mask - it should be aligned along the edge of the mask shape.@jenn mccabe Jenn for the life of me I cannot figure out what is going wrong with mine. I used to do this all the time. Once i get to the stage shown in the image below, I only see the original photo masked onto the shape. Can you see anything wrong?? btw, PSE15
Create a solid/filled-in shape on it's own layer underneath the original photo layer. A rectangle shape is used in the example (Section 1 above), but feel free to use any shape you wish or even a mask. Make sure your shape is smaller than the full size of the photo. About half the size is a good rule of thumb.
Oh My! You brave soul jumping into new software. Hang on a second. I will do some screen shots for you RJMJ!Hey There Everyone...This Effect Looks Cool But I Don't Know How To Get Past Step 3..."Create A Solid/Filled-In Shape"...As Some Of You May Know...I Have Been Scrapping All This Time Without Photoshop...Using An Old Program + Multiple Free Programs...Either Way...There Is No Way To Duplicate This Process In Any Of The Software That I Use...But...
*My Sister,Brother & Brother-In-Law Gave Me Adobe Photoshop Elements 2019 For Christmas...It Pretty Much Terrifies Me!...I Have Installed The Program & Have Watched Various Videos On Line To Try To Navigate The Program But I Haven't Really Had The Time To Learn How To Use This Software Yet...I Am Still Using My Other Tried & True Software To Create All The Pages I Have Created So Far For MOC7 & Otherwise...But I Decided To Give This A Stab...
*I Figured Out How To Get My Photo In & How To Duplicate It...So Now I Have 2 Layers But I Don't Really Understand The Next Step...I Don't Know How To "Create A Solid/Filled-In Shape In Photoshop"...I Really Feel I Am Out Of The Loop Here...If I Can't Figure Out How To Do This Step...Perhaps I Won't Figure Out How To Do This Challenge All Together...So I Will Have To Stop Doing MOC7...I Don't Like The Thought Of This...Maybe Someone Can At Least Try To Explain To Me How To Do This Next Step...I'm Lost & Don't Know How To Proceed...Sorry...Hate To Be The Newbie Who Doesn't Know How To Do Anything...
Thanks In Advance...RJ