ArmyGrl
Merlot, Cab, Chard, Reisling - all 4 food groups!
- Joined
- Sep 1, 2012
- Messages
- 4,994
Welcome to Day 22 of MOC - Make Your Own Bobblehead!

Today’s challenge fits into the Art Journal category – and it will get you thinking outside the box. Many great artists from Leonardo Da Vinci to Frida Kahlo kept art journals. An art journal is a place to explore and experiment. It’s a safe place to try new techniques and media. The focus of art journaling is the creative process and the journey – rather than the destination or end product. So for today’s challenge relax, let loose, and let your creative muse and intuition guide through experimentation. Above all, have fun – and allow yourself a little giggle at the end of the creative process!
Today’s challenge also involves technique. There are many techniques one can use to create a bobblehead. If uncertain how to get started, please check out the tutorials below.
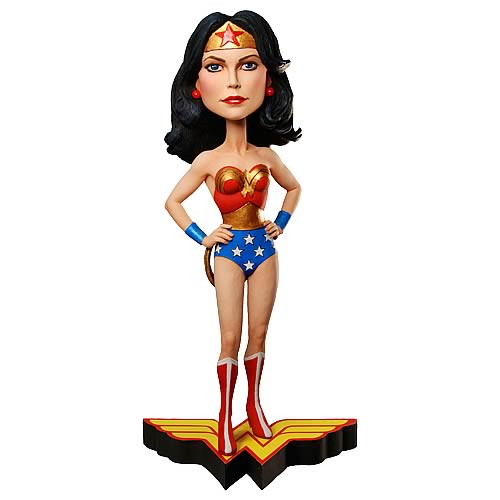
So, what is a bobblehead? A bobblehead is also known as a nodder or wobbler because the head can shake up or down, or move around, when touched. For today’s challenge a bobblehead is a figure in which the head is disproportionately enlarged compared to the body.
For the Bobblehead challenge, you may make more than one bobblehead and you may make a domestic cat or a dog bobblehead instead of a human bobblehead. But the simple requirement is to make and use a bobblehead in your layout. Note: no other animal may be used for your bobblehead!!! Why? An elephant already has a large head. A lion already has a large head. I NEED TO SEE that YOU enlarged a head and opening this challenge up to the kingdom of animalia (which also includes insects) will be too difficult for me as judge.
After you make a bobblehead, you may convert it into a sticker (e.g. adding a stroke to the figure).

Challenge Requirements:
1. Make a bobblehead from a photograph or ephemera. You MAY NOT use a pre-extracted art doll, figure, or model. Your photograph can be new, old, stock, or ephemera – pretty much anything except a pre-extracted figure. Your bobblehead must be human or a domestic cat or a dog (no other animals).
2. Make the head at least the same width as the shoulders – or larger. This is subjective and I am not looking for exact measurements – but I need to SEE an enlarged head. Be sure to keep enough shoulder/body in view so that I can determine the proportions. This is not a floating head – the enlarged head must be attached to the body.

3. After you make your bobblehead, use it in any style layout. Examples include, but are not limited to, art journal style, clean and simple, or filled. You may use a template for your finished layout. Remember, Artist Trading Cards are not allowed this cycle.
4. You may run additional filters or process your bobblehead in other apps to create a cartoon look. If you do this, please include the original photo in this thread so I may have a comparison to go by.

A few tips on photo selection and styling (tips, not requirements):
- Hair is difficult, but not impossible to work with. It is best to choose a subject with short hair, hair pulled up, or hair that is behind the shoulders. Remember, you can use ephemera from one of our TLP designers, or a stock photo. As an art journal challenge, you may not be as concerned about printing out your result for a scrapbook.
- Full body photographs are fun to work with but not required. A portrait photograph is doable.
- Creating an out-of-bounds effect is very fun with bobbleheads – but not required.
- I recommend a full extraction of the subject – but extraction is not required. An extracted head can be placed onto another body – think of creating an art doll or transforming yourself into a mermaid or action hero.
MOC Requirements:
Your page must be a new page to count for the Month of Challenges. Your page must be posted in three places:
1. Uploaded to the TLP Gallery (not an outside hosting site).
2. Posted in your page thread you created in the MOC Layouts Folder. You should have one post per completed challenge page. If you complete all 31 challenges, your thread should contain 31 posts. Please do not comment in the participants’ page threads so we can keep them clean.
3. Posted in this thread. People can comment here if they wish.
Your page must contain Lilypad product (pages with photos and font only do not count). If you use product from other stores, your pages must contain at least 75% current Lilypad product (currently for sale in the store from either permanent designers or guest designers).
Additional MOC Requirements are found here.
Recap: Create at least one human, or domestic cat, or dog bobblehead – make the head approximately shoulder width or larger. Use the bobblehead in a layout following MOC guidelines.
Inspiration from the Pollywogs (these are hilarious!!!)
@weaselwatchr (Danica):

@Iowan (Carol):

@MiekSter (Annemieke):

And original photo for comparison:

***Tutorials in new post***
Today’s challenge fits into the Art Journal category – and it will get you thinking outside the box. Many great artists from Leonardo Da Vinci to Frida Kahlo kept art journals. An art journal is a place to explore and experiment. It’s a safe place to try new techniques and media. The focus of art journaling is the creative process and the journey – rather than the destination or end product. So for today’s challenge relax, let loose, and let your creative muse and intuition guide through experimentation. Above all, have fun – and allow yourself a little giggle at the end of the creative process!
Today’s challenge also involves technique. There are many techniques one can use to create a bobblehead. If uncertain how to get started, please check out the tutorials below.
So, what is a bobblehead? A bobblehead is also known as a nodder or wobbler because the head can shake up or down, or move around, when touched. For today’s challenge a bobblehead is a figure in which the head is disproportionately enlarged compared to the body.
For the Bobblehead challenge, you may make more than one bobblehead and you may make a domestic cat or a dog bobblehead instead of a human bobblehead. But the simple requirement is to make and use a bobblehead in your layout. Note: no other animal may be used for your bobblehead!!! Why? An elephant already has a large head. A lion already has a large head. I NEED TO SEE that YOU enlarged a head and opening this challenge up to the kingdom of animalia (which also includes insects) will be too difficult for me as judge.
After you make a bobblehead, you may convert it into a sticker (e.g. adding a stroke to the figure).
Challenge Requirements:
1. Make a bobblehead from a photograph or ephemera. You MAY NOT use a pre-extracted art doll, figure, or model. Your photograph can be new, old, stock, or ephemera – pretty much anything except a pre-extracted figure. Your bobblehead must be human or a domestic cat or a dog (no other animals).
2. Make the head at least the same width as the shoulders – or larger. This is subjective and I am not looking for exact measurements – but I need to SEE an enlarged head. Be sure to keep enough shoulder/body in view so that I can determine the proportions. This is not a floating head – the enlarged head must be attached to the body.
3. After you make your bobblehead, use it in any style layout. Examples include, but are not limited to, art journal style, clean and simple, or filled. You may use a template for your finished layout. Remember, Artist Trading Cards are not allowed this cycle.
4. You may run additional filters or process your bobblehead in other apps to create a cartoon look. If you do this, please include the original photo in this thread so I may have a comparison to go by.
A few tips on photo selection and styling (tips, not requirements):
- Hair is difficult, but not impossible to work with. It is best to choose a subject with short hair, hair pulled up, or hair that is behind the shoulders. Remember, you can use ephemera from one of our TLP designers, or a stock photo. As an art journal challenge, you may not be as concerned about printing out your result for a scrapbook.
- Full body photographs are fun to work with but not required. A portrait photograph is doable.
- Creating an out-of-bounds effect is very fun with bobbleheads – but not required.
- I recommend a full extraction of the subject – but extraction is not required. An extracted head can be placed onto another body – think of creating an art doll or transforming yourself into a mermaid or action hero.
MOC Requirements:
Your page must be a new page to count for the Month of Challenges. Your page must be posted in three places:
1. Uploaded to the TLP Gallery (not an outside hosting site).
2. Posted in your page thread you created in the MOC Layouts Folder. You should have one post per completed challenge page. If you complete all 31 challenges, your thread should contain 31 posts. Please do not comment in the participants’ page threads so we can keep them clean.
3. Posted in this thread. People can comment here if they wish.
Your page must contain Lilypad product (pages with photos and font only do not count). If you use product from other stores, your pages must contain at least 75% current Lilypad product (currently for sale in the store from either permanent designers or guest designers).
Additional MOC Requirements are found here.
Recap: Create at least one human, or domestic cat, or dog bobblehead – make the head approximately shoulder width or larger. Use the bobblehead in a layout following MOC guidelines.
Inspiration from the Pollywogs (these are hilarious!!!)
@weaselwatchr (Danica):
@Iowan (Carol):
@MiekSter (Annemieke):
And original photo for comparison:
***Tutorials in new post***
Last edited: