Technique Slow Scrap | Saturday MAR 28 @11am EST/8am PST

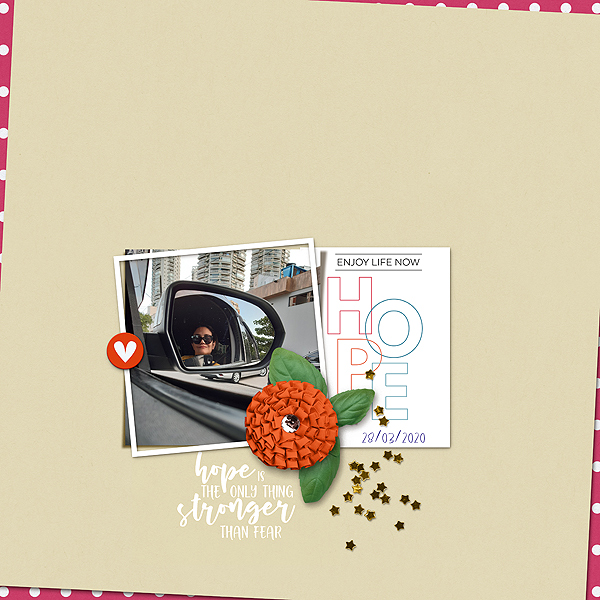
mine! yesterday I went out of my home, after more than a week, but I only stayed at the car while my fiance went to the bakery, pharmacy etc..I just needed to see the world outside!

 
I'm really liking these layouts! I wish I could get the techniques to work better for me. I am wondering if any else in the thread is using PSE 2019 and was successful following @FarrahJobling 's tutorial? I missed the chat, but the tutorial seems pretty straight forward. I spent several hours trying to adjust settings and options - I finally got too frustrated and gave up. I think I am probably missing something easy - any suggestions are appreciated.
 
I'm really liking these layouts! I wish I could get the techniques to work better for me. I am wondering if any else in the thread is using PSE 2019 and was successful following @FarrahJobling 's tutorial? I missed the chat, but the tutorial seems pretty straight forward. I spent several hours trying to adjust settings and options - I finally got too frustrated and gave up. I think I am probably missing something easy - any suggestions are appreciated.

Here's a tutorial by @cfile that is one idea for a work around:
https://the-lilypad.com/forum/threads/accordion-frame-ps-cc.66068/
 
I'm really liking these layouts! I wish I could get the techniques to work better for me. I am wondering if any else in the thread is using PSE 2019 and was successful following @FarrahJobling 's tutorial? I missed the chat, but the tutorial seems pretty straight forward. I spent several hours trying to adjust settings and options - I finally got too frustrated and gave up. I think I am probably missing something easy - any suggestions are appreciated.

i’m on my phone so I can’t do screenshots, but to get the stroke as its own frame in PSE you need to make it on its own layer. First turn off the stroke on the photo layer by clicking on the fx icon in the layers panel.

then hold down control and click on the icon of the photo in the layers panel. This will put marching ants around the photo. Now click the create new layer icon to make a layer above the photo. It’s a square with the corner turned up.

The marching ants should still be on and you will click on edit, stroke. I think it says something about outline selection but I’m not sure from memory.

here you will select the size and color. I think 20 to 25 is good for a photo but adjust to your liking. Also make sure inside is checked so the corners are crisp points. Hit OK and you should have a frame on its own layer.

Then, you would add a drop shadow to the frame layer and separate it to it's own layer and run the warp on the drop shadow layer.

hope that helps those using PSE.
@cookingmylife
 
Last edited:
I finally gave up yesterday after not having success in PSCS or PSE2019. Too tired to continue last night

@cfile @mommyish I am working on a Mac with Catalina OS and tried adding the Style given for PS as Ive had no problem with that adding an Action .atn file or a Style .psl file. However, if I need to add the data.xml file I don't know where to put it in Mac Catalina, it's been so long since I needed too and I'm thinking that the location is now in the Hidden Files?

I may try @Joan K 's solution to check @gonewiththewind 's solution but I would like to use the Mommyish Stylin 263 as is.

The mommy-ish separate layers action only works with her styles. I have not been able to get it to work with styles from other designers so that’s probably why it’s not working with the one from Farah.
 
I'm really liking these layouts! I wish I could get the techniques to work better for me. I am wondering if any else in the thread is using PSE 2019 and was successful following @FarrahJobling 's tutorial? I missed the chat, but the tutorial seems pretty straight forward. I spent several hours trying to adjust settings and options - I finally got too frustrated and gave up. I think I am probably missing something easy - any suggestions are appreciated.

Here is the PSE version of my accordian tutorial and in there there I show how to sepereate the shadow in PSE. Hop that helps, Joan!
https://the-lilypad.com/forum/threads/accordion-frame-pse.66100/#post-1172005
 
I need to practice this a whole bunch more, I am not sure I achieved what I wanted to. I tried it on the photo only and it looks like I was too timid. The instructions are great, so I definitely will be. Thank you Farrah!!
 
Thank you @cfile and @keepscrappin - those tutorials seem like what I need for PSE2019.

@cfile with the PSE accordion can I just start with the later steps if using 1 square or rectangle for a Slow Scrap etc? I'm also wondering if this would work with inches instead of pixels. I have other things to concentrate on today but will have to try it all out later. I'd still really like to know where that .xml file of @mommyish goes. I may ask on FB as there may be more Mac users. Thanks again!
 
I will have to try this out another time because I seem to have run into some roadblocks - still. But I have to laugh at this one! half assed to be sure which was worth a laugh on its own. While I could move the shadow layer from the FX spot in layers it never went on a layer of its own so when I did the wave, it also waved the photo. @keepscrappin nor could I get the 2nd stroke to move. One day!!!

 
I will have to try this out another time because I seem to have run into some roadblocks - still. But I have to laugh at this one! half assed to be sure which was worth a laugh on its own. While I could move the shadow layer from the FX spot in layers it never went on a layer of its own so when I did the wave, it also waved the photo. @keepscrappin nor could I get the 2nd stroke to move. One day!!!


You're so close, don't give up! Without seeing your layers I'm not sure if this is the problem, but are you trying to use the Mommyish Stylin 263 action to separate the stroke/frame from the photo in PSE? If so, that action won't do that. It is designed to only separate the drop shadow, not any of the other effects including the stroke. The only way I know to get the stroke/frame on it's own layer in PSE is to make it on it's own layer with the instructions above. Then if you want to warp the shadow of the stroke/frame, you would need to add a drop shadow to the frame and then separate the drop shadow from the frame using the instructions in Cheryl's video. After the shadow is separated you can run the free paper warping action on the separated shadow layer. Hope that makes sense and helps.
 
Thank you @cfile and @keepscrappin - those tutorials seem like what I need for PSE2019. Re starting on the later steps I don’t see why not! Have fun!

@cfile with the PSE accordion can I just start with the later steps if using 1 square or rectangle for a Slow Scrap etc? I'm also wondering if this would work with inches instead of pixels. I have other things to concentrate on today but will have to try it all out later. I'd still really like to know where that .xml file of @mommyish goes. I may ask on FB as there may be more Mac users. Thanks again!
 
Things I learned after playing with this:

If I made the stroke a center stroke it worked fine. I was using an outside stroke and just getting a solid box.

I also needed to stroke my element from the style box, not from edit/stroke in order to get a separate stroke layer.

Thank you SO MUCH. I love being able to do this!

 
Screen Shot 2020-03-30 at 8.21.57 AM.png
Christa all I needed to do was to start at Step 12 of your PSE tutorial to see how to make the shadow its own layer. @cfile Then I used @gonewiththewind 's action to warp. Now I'll move on to trying the frame on it's own layer - later today. Thanks again. I apparently can only learn one new trick at at time and each day of being inside has seemed to suck a brain cell cluster each day! Obviously I didn't get all the shadow as you see my 'shadow' box still there. Paper will cover that ... :angel
 
View attachment 387439 View attachment 387439 Christa all I needed to do was to start at Step 12 of your PSE tutorial to see how to make the shadow its own layer. @cfile Then I used @gonewiththewind 's action to warp. Now I'll move on to trying the frame on it's own layer - later today. Thanks again. I apparently can only learn one new trick at at time and each day of being inside has seemed to suck a brain cell cluster each day! Obviously I didn't get all the shadow as you see my 'shadow' box still there. Paper will cover that ... :angel
Just bring the shadow all the way out and then put the marquee around the shadow and click on Cut via new layer :) It just takes time .. Glad the accordion tutorial could help you :)
 
@keepscrappin Here is a shot of my layers when I tried to separate @mommyish 's Stylin'263 Shadow. I ended up with the two blank layers above the your method of using one of her shadows and then running the PSE action and then trying the PS action. I'm pretty sure it didn't work right because I still didn't know where to put the .xml file included for the PSE version. Since about 3 or 4 PSE versions back I have always been able to use the normal PS .asl file but apparently not with this one. Shadow action is at the bottom of the list.


(This image does show how I did move the shadow starting with @cfile 's PSE Accordian tutorial just starting at Step 12.)

Screen Shot 2020-03-30 at 8.26.57 AM.png
 
@keepscrappin Here is a shot of my layers when I tried to separate @mommyish 's Stylin'263 Shadow. I ended up with the two blank layers above the your method of using one of her shadows and then running the PS action and PSE action. I'm pretty sure it didn't work right because I still didn't know where to put the .xml file included for the PSE version. Since about 3 or 4 PSE versions back I have always been able to use the normal PS .asl file but apparently not with this one.

(This image does show how I did move the shadow starting with @cfile 's PSE Accordian tutorial just starting at Step 12.)

View attachment 387444
I don't have a mac with Catalina so unfortunately, i cannot trouble shoot for you. I have pc and PSE 15 in addition to the CC .. so sorry I cannot help further, but at least with the work around you can seperate... you would do the same with the stroke too.
 
Back
Top