Trista
I'm Working On It
- Joined
- Oct 4, 2010
- Messages
- 5,003
Hello!! I am so excited to officially host my first Art Journal chat and challenge here at The Lilypad. I am only standing in for our AJ Queen, Dalis. She has given me some great advice on making today's challenge and chat a swimming success. I hope you will join me in a bit for a chat in the chat room. The times are posted in the image below.
Our sponsor for today is the amazingly talented Valorie Wibbens.
For today's challenge we are going to make paper look worn, torn, crumpled, distressed, and grungy. There are several ways to achieve this and we are only going to be focusing on a small portion of distressing paper.
I have a tutorial, but first I want to share with you some super products from our sponsor that make creating the worn look a breeze.
A Bit Worn No. 7 is brand new and part of the June BYOC. Woot!!
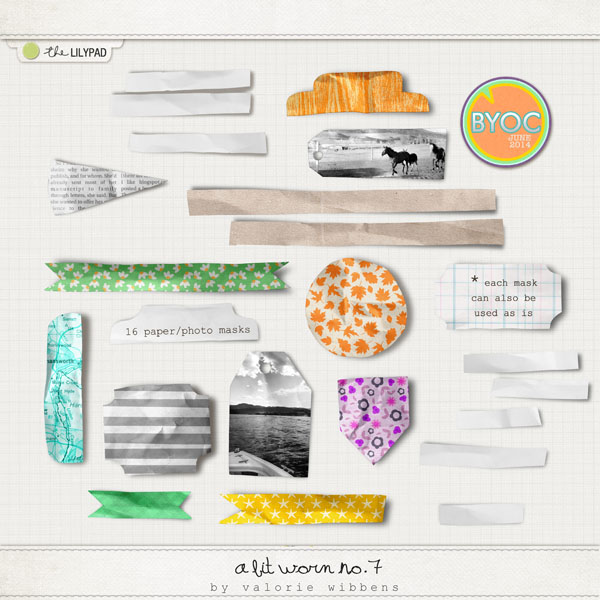
Here is a peek at more of the A Bit Worn Series from Valorie Wibbens.


Now let's get on to the tutorial…
The original plan was a video but my microphone didn't record any of the audio. Did I tell you all I was having a bad day? Enough whining. On with the show, the old fashioned way.
We are going to add some texture and shadows to a paper to make it look grungy.
Let's get started.
In Photoshop, open a 12in x 12in 300 pixel canvas and create or drag in an existing background paper. I am using one of the papers from For the Record by Valorie Wibbens.
Click on Filter then select the Texture option from the pop out menu. In Photoshop CS6 or above you will have to click on Filter Gallery to find the Texture option.

In the texture menu select Texturizer and use the settings shown. In case you cannot see the image, the settings are: Texture - Canvas, Scaling - 70, Relief - 4
Click OK.

Now your page or photo has texture. You can play with and adjust the different settings in the texture menu to achieve different results.
Having texture is great, but we don't want to stop there. For adding even more grunge let's do some shadow work.
What we are going to do with our already textured background is to grab the burn tool. It is located in the tool palette with the dodge and sponge tool.

From the top menu select a soft brush and adjust the size to suit your needs. I chose 137. Change the Range to Shadows and the Exposure to 55%.

**If you are using a lighter color paper you can choose Midtones instead of Shadows. You can also deselect/uncheck Protect Tones and the burn color will match the background paper.**
Now on your canvas pick an area you want to darken and click and drag the mouse across that area, then release. You will see the area darken slightly. The more you go over the area the darker it will get. Do this until you have the result that you want.

Now play around with this until your paper is as grungy as you want it.
Below you can compare the before and after.

The challenge details:
* Create a grungy, textured background for your art journal layout.
* Use at least 50% TLP product to be eligible for the prize drawing.
* Upload to the Art Journal Gallery and post in this thread.
* Post pages by the July 6th, 2014 deadline.
* Have fun! Do it!! It's the rules!
Our sponsor for today is the amazingly talented Valorie Wibbens.
For today's challenge we are going to make paper look worn, torn, crumpled, distressed, and grungy. There are several ways to achieve this and we are only going to be focusing on a small portion of distressing paper.
I have a tutorial, but first I want to share with you some super products from our sponsor that make creating the worn look a breeze.
A Bit Worn No. 7 is brand new and part of the June BYOC. Woot!!
Here is a peek at more of the A Bit Worn Series from Valorie Wibbens.
Now let's get on to the tutorial…
The original plan was a video but my microphone didn't record any of the audio. Did I tell you all I was having a bad day? Enough whining. On with the show, the old fashioned way.
We are going to add some texture and shadows to a paper to make it look grungy.
Let's get started.
In Photoshop, open a 12in x 12in 300 pixel canvas and create or drag in an existing background paper. I am using one of the papers from For the Record by Valorie Wibbens.
Click on Filter then select the Texture option from the pop out menu. In Photoshop CS6 or above you will have to click on Filter Gallery to find the Texture option.
In the texture menu select Texturizer and use the settings shown. In case you cannot see the image, the settings are: Texture - Canvas, Scaling - 70, Relief - 4
Click OK.
Now your page or photo has texture. You can play with and adjust the different settings in the texture menu to achieve different results.
Having texture is great, but we don't want to stop there. For adding even more grunge let's do some shadow work.
What we are going to do with our already textured background is to grab the burn tool. It is located in the tool palette with the dodge and sponge tool.
From the top menu select a soft brush and adjust the size to suit your needs. I chose 137. Change the Range to Shadows and the Exposure to 55%.
**If you are using a lighter color paper you can choose Midtones instead of Shadows. You can also deselect/uncheck Protect Tones and the burn color will match the background paper.**
Now on your canvas pick an area you want to darken and click and drag the mouse across that area, then release. You will see the area darken slightly. The more you go over the area the darker it will get. Do this until you have the result that you want.
Now play around with this until your paper is as grungy as you want it.
Below you can compare the before and after.
The challenge details:
* Create a grungy, textured background for your art journal layout.
* Use at least 50% TLP product to be eligible for the prize drawing.
* Upload to the Art Journal Gallery and post in this thread.
* Post pages by the July 6th, 2014 deadline.
* Have fun! Do it!! It's the rules!
Last edited:
")


")

