Arumrose
Filling up my passport!
- Joined
- Apr 29, 2010
- Messages
- 7,937
That was fun and I love to see how different our layouts look like using the same instrcutions!
Follow along with the video below to see how to install our site as a web app on your home screen.
Note: This feature may not be available in some browsers.
Oh, I didn't think of that! Hope not!I see a lot of us have white strokes on the edge of our photo. Do we all need to redo to remove as your instructions now say "nowhere does the instructions reflect a frame on the photo"... Please let me know. If so I will redo.
Ok, re-reading the instructions I feel completely unsure that I followed them properly...Here's my page, thanks for the inspiration! I counted the clip (holding the banner on the left), button and brad (near the flower) as fasteners, I hope it's ok.
") No hurry, though!! <3
No hurry, though!! <3
Of course I do!!@chloe_digiscrap I'm sure Julie will answer to this...but I just wanted to say how delighted I am to see you here!!!!!!!!!!!!!!!! Im sure you remember me? even though years have passed? super super happy to have you here in my scrap home!!!!!!!!!
 Hi Cynthia!!
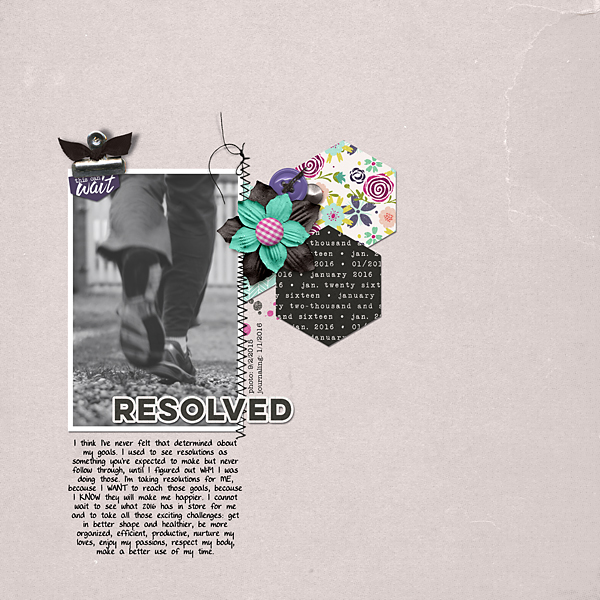
Can someone tell me if a button counts as a fastener?
I see a lot of us have white strokes on the edge of our photo. Do we all need to redo to remove as your instructions now say "nowhere does the instructions reflect a frame on the photo"... Please let me know. If so I will redo.
Ok, re-reading the instructions I feel completely unsure that I followed them properly...
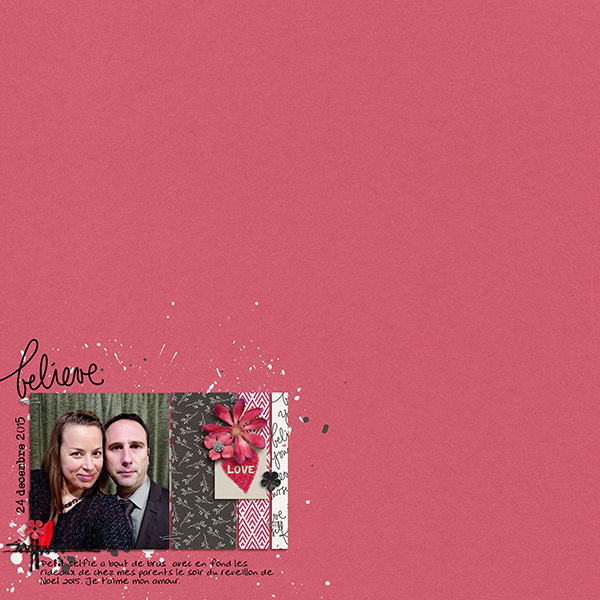
1. Place a solid color paper as your background - That's ok!
2. Place one photo on the left side of the page - check, although I'd love a confirmation if white stroke is good to go.
3. Place three patterned papers, in any size or shape, to the right of your photo - they are on the right, yet not completely separated from it, is that ok?
4. Include at least one flower on your page, placed over the patterned paper - check (the brad is part of the original element)
5. Include at least one fastener on your page - I have three: clip (including the ribbon, part of the original element), button and brad, are those ok?
6. Include some type of paint or stain brush on your page - check (pinck and black splatter behind the patterned papers
7. Include either stitching OR a ribbon, to the right of your photo - check (only stitching on the right)
8. Include a tag or banner somewhere on the page - check (the "this can't wait" in the top left corner)
9. Your title must consist of one word only, and should be placed above your photo - non-native English speaker question: does above mean on the top of the picture (like a higher layer) or does it mean on the top side of the page?
10. You must include at least two lines of journaling below your photo (you can include more if you want) - done!
11. The date of your photo should be included somewhere on the page - check (on the right of the pic, vertically).
@mrs2a50, could you clarify those questions, pretty please? I second-guess my English all of a sudden!

PHEW! <wiping forehead> Thank you Julie!! @mrs2a50A white (or black) stroke is fine. I'm treating that like a printed photo might look on a paper page. An actual frame, however, is not okay.
")