- Joined
- Sep 2, 2011
- Messages
- 25,786
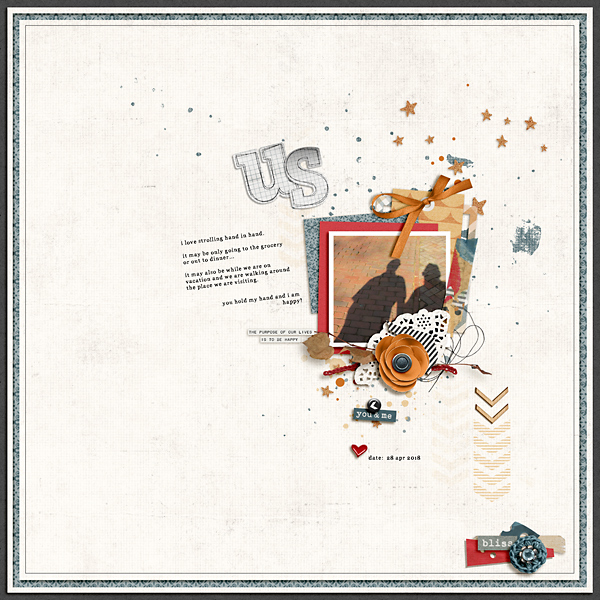
Ferdy @Ferdy asked me how I made the matted border that I use a lot for my pages, so below is a quick tutorial. This is being done in Photoshop CC however this is a simple process and can be done in any of the scrapping softwares.
Here is the page I made with the border:
***If you click on the screen shots they will enlarge to see better") ***
***
1) Start with choosing your papers. I will use 3 papers from Pink Reptile Design’s Unscripted papers (Sept 2020 BYOC):
Off white: PRD – Unscripted SP 06
Teal : PRD – Unscripted SP 09

Teal Patterned: PRD – Unscripted PP 07

2) In your layout, place your base/background paper layer. I am using the teal (SP 09) that I have darkened a little, as the bottom layer.
3)Add a new layer above the background layer and place the off white paper (SP 06). I use the Edit>Transform >Scale on the white paper layer to resize a smidge. On most PS programs you can hold Alt and drag in from the corner and it will resize H & W (height & width) at the same time, otherwise resize each (H & W) the same amount. Then add a shadow to the off white paper like this:

4) Now we need to add a new blank layer above the white paper layer
5)Using the Marquee Rectangle tool on the blank layer we need to draw a rectangle in from the edge of the white paper. I use the little + guide as a measure for the side and bottom edge width: (Start with the marquee tool at the top right and holding the shift move your mouse down to the bottom right and using the + for the guide)

6) With ants active, using the paint can (flood tool) on the blank layer fill with color – any color.


7) Repeat step 5 with the marquee rectangle tool and on the flood filled layer do the same from the edge using the + as your guide for width… from top left to bottom right holding down the shift key.
Here is the page I made with the border:
***If you click on the screen shots they will enlarge to see better
***1) Start with choosing your papers. I will use 3 papers from Pink Reptile Design’s Unscripted papers (Sept 2020 BYOC):
Off white: PRD – Unscripted SP 06
Teal : PRD – Unscripted SP 09
Teal Patterned: PRD – Unscripted PP 07
2) In your layout, place your base/background paper layer. I am using the teal (SP 09) that I have darkened a little, as the bottom layer.
3)Add a new layer above the background layer and place the off white paper (SP 06). I use the Edit>Transform >Scale on the white paper layer to resize a smidge. On most PS programs you can hold Alt and drag in from the corner and it will resize H & W (height & width) at the same time, otherwise resize each (H & W) the same amount. Then add a shadow to the off white paper like this:
4) Now we need to add a new blank layer above the white paper layer
5)Using the Marquee Rectangle tool on the blank layer we need to draw a rectangle in from the edge of the white paper. I use the little + guide as a measure for the side and bottom edge width: (Start with the marquee tool at the top right and holding the shift move your mouse down to the bottom right and using the + for the guide)
6) With ants active, using the paint can (flood tool) on the blank layer fill with color – any color.
7) Repeat step 5 with the marquee rectangle tool and on the flood filled layer do the same from the edge using the + as your guide for width… from top left to bottom right holding down the shift key.
Last edited:

 thank you so much!!
