- Joined
- Feb 28, 2012
- Messages
- 13,334
Hey, hey, everyone and welcome to Day 6!! I’m so excited to be hosting this challenge! Today we are going to be altering a photo using the dispersion technique. If you’re not exactly sure what that is, here’s an example:

Before you start to worry that it’s really complicated, let me assure you its really pretty easy and a fun technique to play around with! This technique is really great for subjects in motion to enhance that motion, but it can also be used really effectively on a still subject. So let’s get in to it.
The easiest way to do this is to start with a photo that has the subject on a solid, light color background like the one above. It doesn’t have to be, and I didn’t start that way, so I’ll point out how I cheated. I chose this photo:

The first thing you want to do is create a 2 copies of your background layer. On the bottom copy, we need to take the subject out of the background. Do this by using the lasso tool and just make a rough outline around the subject. Then go to fill> content aware fill to take your subject out. If you don’t have content aware, you can always use the clone stamp remove the subject. It does not have to be perfect at all.


Now we are going back to the top copy we made and select just the subject. I used the quick selection tool to isolate my granddaughter. You can do this however is easiest for you, and you don’t have to be absolutely exact. Once the selection is made, make 2 of copies of just your subject using ctrl-j or cmd-j. Once you make the copies of the subject, you don't need that second background copy, so just hide it.

On the bottom layer of just the subject, go to filter>liquify and with a big brush just distort the heck out of your subject in the direction you want the splatter to go. Click ok and let it render. You can also use the warp tool if you prefer.

**Optional: This is where I cheat on the background. I add a white layer under the two copies of my granddaughter. Like I said, you don’t have to, but it makes seeing the brush work easier. If you started with a photo that was on a white or light background you're golden and definitely don't need this step.**

Now, with the liquified layer selected, add a layer mask and use ctrl-I or cmd-I to invert that mask. Go to the top layer of just the subject and add a layer mask to that one, leaving it white.

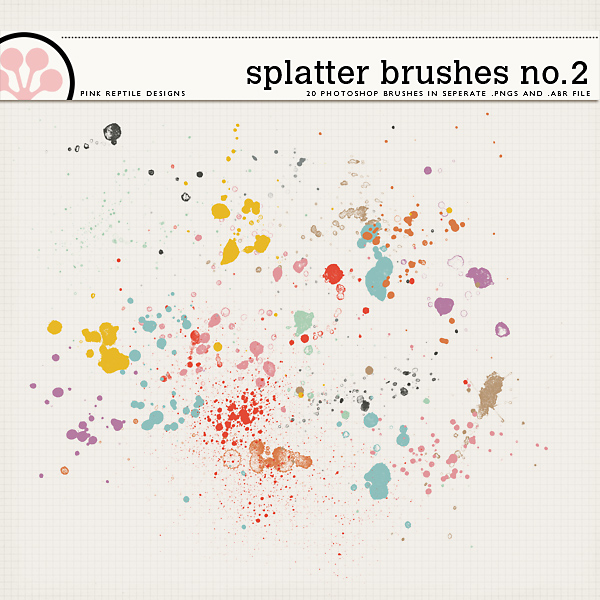
Now the fun part, choose a splatter brush. If you don’t have any, there are lots of free ones out there you can find with a quick search and some in the shop here! You can make it as big or small as you want or play around with the sizes.

On the top layer of the subject, make sure black is selected as your foreground color, and then just click around (don’t drag) right on top of the subject along the edge where the splatter effect will be. You can even change brushes if you’d like. I also avoided the face area.
**make sure the MASK is selected before using the brush

Now go to the bottom layer (with the black mask) and make sure you change your foreground color to white. Click around beside the subject to reveal the image that you liquified or warped.
**make sure the MASK is selected before using the brush

If you've added that white layer, just hide it or delete it now.

That’s pretty much all there is to it!! Now the fun part of using it in a layout. You can always use the photo you created on a traditional page, but this is also super fun for an art journal type page by just using your altered subject and a background of your choice. You can also play around with all different kinds of brushes to get some really cool effects!
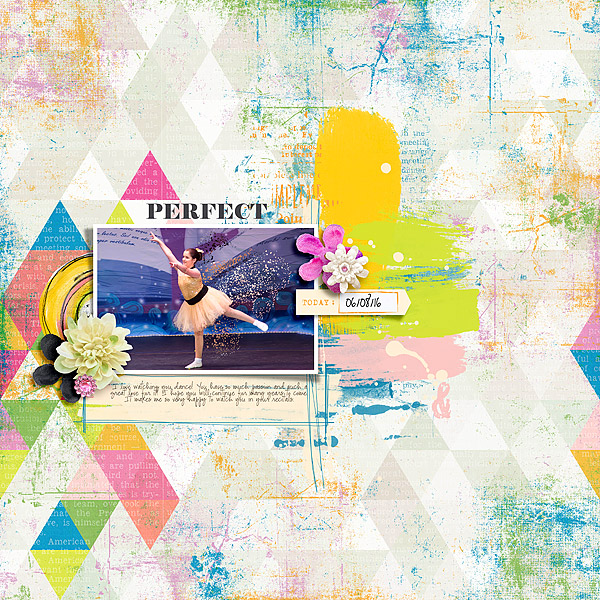
Here are a couple of example pages from me:

I found a couple of tutorials online to help those of you who may be using other programs:
Dispersion with GIMP https://hubpages.com/art/GIMP-Creating-a-Dispersion-Effect
Splatter Effect with Pixlr:
***And, if you want to watch the amazing Cheryl, of Fiddle-Dee-Dee Designs, actually go through the steps of this technique and scrap a fantastic page, you can do that right here (thanks, Chery @gonewiththewind!!):
Challenge Requirements:
1. Create a layout with a photo using the dispersion technique.
2. You must use scrap product on your page; you cannot have JUST a photograph. Remember to follow the 75% current product rule (see below)
General Requirements:
Your page must be a new page in order to count for the Month of Challenges. Your page must be posted in three places:
Before you start to worry that it’s really complicated, let me assure you its really pretty easy and a fun technique to play around with! This technique is really great for subjects in motion to enhance that motion, but it can also be used really effectively on a still subject. So let’s get in to it.
The easiest way to do this is to start with a photo that has the subject on a solid, light color background like the one above. It doesn’t have to be, and I didn’t start that way, so I’ll point out how I cheated. I chose this photo:
The first thing you want to do is create a 2 copies of your background layer. On the bottom copy, we need to take the subject out of the background. Do this by using the lasso tool and just make a rough outline around the subject. Then go to fill> content aware fill to take your subject out. If you don’t have content aware, you can always use the clone stamp remove the subject. It does not have to be perfect at all.
Now we are going back to the top copy we made and select just the subject. I used the quick selection tool to isolate my granddaughter. You can do this however is easiest for you, and you don’t have to be absolutely exact. Once the selection is made, make 2 of copies of just your subject using ctrl-j or cmd-j. Once you make the copies of the subject, you don't need that second background copy, so just hide it.
On the bottom layer of just the subject, go to filter>liquify and with a big brush just distort the heck out of your subject in the direction you want the splatter to go. Click ok and let it render. You can also use the warp tool if you prefer.
**Optional: This is where I cheat on the background. I add a white layer under the two copies of my granddaughter. Like I said, you don’t have to, but it makes seeing the brush work easier. If you started with a photo that was on a white or light background you're golden and definitely don't need this step.**
Now, with the liquified layer selected, add a layer mask and use ctrl-I or cmd-I to invert that mask. Go to the top layer of just the subject and add a layer mask to that one, leaving it white.
Now the fun part, choose a splatter brush. If you don’t have any, there are lots of free ones out there you can find with a quick search and some in the shop here! You can make it as big or small as you want or play around with the sizes.
On the top layer of the subject, make sure black is selected as your foreground color, and then just click around (don’t drag) right on top of the subject along the edge where the splatter effect will be. You can even change brushes if you’d like. I also avoided the face area.
**make sure the MASK is selected before using the brush
Now go to the bottom layer (with the black mask) and make sure you change your foreground color to white. Click around beside the subject to reveal the image that you liquified or warped.
**make sure the MASK is selected before using the brush
If you've added that white layer, just hide it or delete it now.
That’s pretty much all there is to it!! Now the fun part of using it in a layout. You can always use the photo you created on a traditional page, but this is also super fun for an art journal type page by just using your altered subject and a background of your choice. You can also play around with all different kinds of brushes to get some really cool effects!
Here are a couple of example pages from me:
I found a couple of tutorials online to help those of you who may be using other programs:
Dispersion with GIMP https://hubpages.com/art/GIMP-Creating-a-Dispersion-Effect
Splatter Effect with Pixlr:
***And, if you want to watch the amazing Cheryl, of Fiddle-Dee-Dee Designs, actually go through the steps of this technique and scrap a fantastic page, you can do that right here (thanks, Chery @gonewiththewind!!):
Challenge Requirements:
1. Create a layout with a photo using the dispersion technique.
2. You must use scrap product on your page; you cannot have JUST a photograph. Remember to follow the 75% current product rule (see below)
General Requirements:
Your page must be a new page in order to count for the Month of Challenges. Your page must be posted in three places:
- Uploaded to the TLP Gallery (not an outside hosting site).
- Posted in your page thread you created in the MOC Layouts Folder. You should have one post per completed challenge page. If you complete all 31 challenges, your thread should contain 31 posts. Please do not comment in the participants’ page threads so we can keep them clean.
- Posted in this thread. People can comment here if they wish.
Last edited:
")