
Today we are introducing a new series on the blog, The Project Parade. Everyone loves a parade! We are behind the scenes strolling the virtual aisles of the Lilypad to showcase some products that will work perfectly for your next themed layout or project! We aren't just showing off what we create, we intend to give you tips and tricks along the way. This month it's all about Halloween! As you know, The Lilypad is filled to the brim with so many amazing products that it is impossible to put it all in one place. The parade will travel through each Wednesday and we hope to continue to inspire you to create. Now let's get this parade in motion.To start off the parade Farrah used Midnight Magick Labels by Amy Wolff to create some fun Halloween decor using items that you probably have lying around the house.Farrah's tip: Add potions to your decorations or party. Paint jars black, … [Read more...]
Hybrid Pocket Letter Tutorial
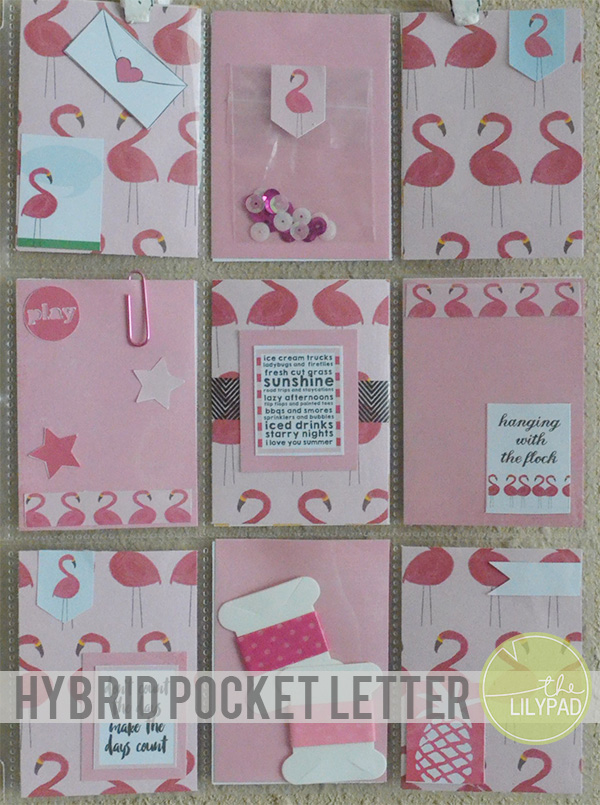
Hybrid Pocket Letter TutorialHello everyone! Today I want to share with you how to create a hybrid letter in this hybrid pocket letter tutorial. For more details about these lovely letters visit here. We would love it if you would join in on the fun of the Lilypad Letter swap over in the forum.I had some left over pieces that were print and cut from the June Joyful Planner, and I got this idea to use them in a pocket letter. I realize that when you see a planner collection you don't immediately think pocket letter, but it really works! The images are small scale and fit perfectly in pockets.Supply List:* Joyful Planner: June by ForeverJoy Designs* Adhesive* Cardstock* Pocket Sleeve Protector* Printer* Silhouette (optional)--------------------------------------------------------------------------------------------------1. Print the pink flamingo patterned paper … [Read more...]
Create a Card: Personalizing Cards

I really enjoy giving cards to family and friends. Cards are perfect way to send birthday wishes, celebrate a special event, or even to just say hello to someone. I always try to have a selection of homemade cards on hand to give out for any of these occasions. I’ve noticed my supply of cards has been getting a bit low and committed myself to making a few cards to bolster it up. Back to School is the theme of today’s card. I also am sharing a tip about how to personalize mass produced cards.Mass producing greeting cards is helpful when you need multiples of the same type of card. This year I decided to mass produce the cards that I give to my children and their teachers on the first day of school. But a bit of mommy guilt crept in and I decided that I “needed” to make each card special. Here is how I did it.To make the cards I used the following supplies: My Tribe | … [Read more...]
How To Make Your Own Stencils
How to Make Your Own StencilsMaking stencils is made easy as well as affordable when you follow the steps in today's tutorial. Let's gather our supplies and get started. Supply List Digital images from The Lilypad of course! Silhouette Cameo or other digital die cutting machine Silhouette Studio Software or other die cutting software Stencil material (or plastic dividers from local Dollar Store) Card stock Various inks and paintsFor this tutorial I am using Storyteller February 2014 SVG Cutting Files by Just Jaimee-----------------------------------------------------------------------------------------1. Open Silhouette Studio Software and edit the new document to "Letter" size. 2. Drag images onto the blank document and resize the images to fit the cut area. Keep adding images to fill the document.*Tip: Keep images away from the right edge where the holes … [Read more...]
How to Make Your Own Enamel Dots
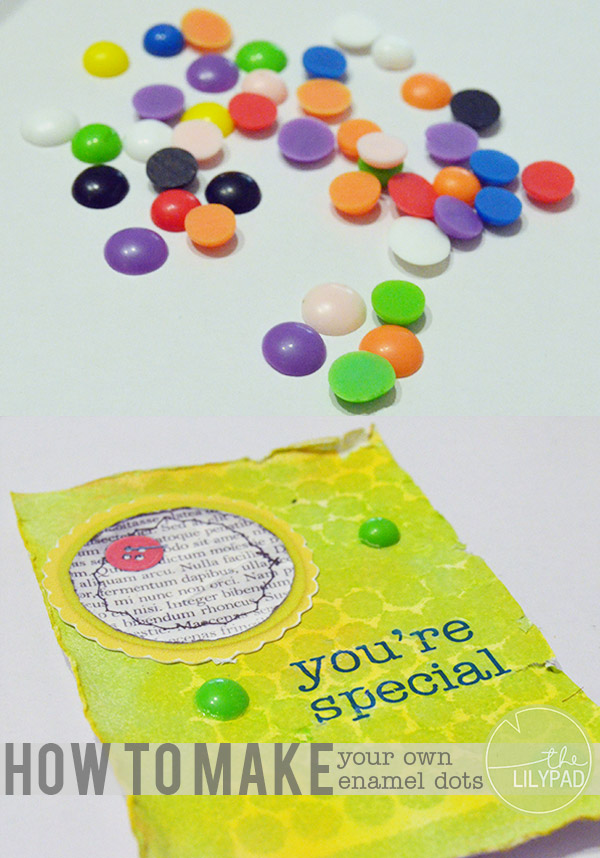
How to Make Your Own Enamel DotsToday I am going to show you how to make your own enamel dots. I just love DIY crafts. There is something so satisfying about putting your own personal touch into crafting. These enamel dots are super easy to create and can be very addicting.Supply List: Perler beads Scissors Metal Tray or cookie sheet Oven Mitt Parchment Paper Toaster Oven1. Set toaster oven to 350° F and allow to preheat.2. Use scissors to cut parchment paper to fit in metal tray.3. Place perler beads about 2 inches apart on a parchment lined metal tray.4. Carefully place metal tray in oven and set the timer for 6 minutes. Due to variations in ovens melting times will vary.5. Use oven mitt to remove the metal from the oven.6. Let cool for one minute. Dots will slide off of parchment paper. A few final … [Read more...]
Pocket Scrapping Out of Order: Tip 4 & 5
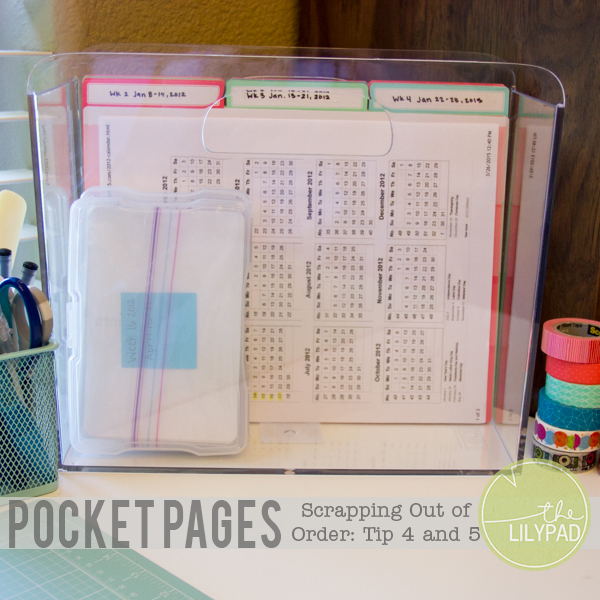
Hey scrappers, Polly Jewelle here! Today I have a two more tips in our pocket scrapping out of order series to share with you. Although I primarily do hybrid pocket scrapping I believe these tips can work with digital pocket scrapping as well. Let’s get started!Tip #4 Create a tracking systemDeciding to pocket scrap out of order can be freeing, but can also lead to a lot of confusion. Did I already document this week? Now what week were these dates? Those are just a few of the questions that can leave you confused when pocket scrapping. I used to spend a good chunk of my scrapping time trying to choose a week to document that wasn’t already done. Finally one day it occurred to me to print off a yearly calendar and mark off the weeks that I have documented in my pocket pages.I googled a yearly calendar and found the Calendar-365.com site that would allow me to print calendars from … [Read more...]