- Joined
- Jun 28, 2008
- Messages
- 33,820
I'm heading into the chat room in just a few minutes for a tutorial chat. I'm going to be teaching you a few tricks with brushes. I will post screen shots and instructions in this thread as I post them in the chat. You can ask questions as we go in the chat room. Can't wait to see who joins me! ")
Here we go!!!
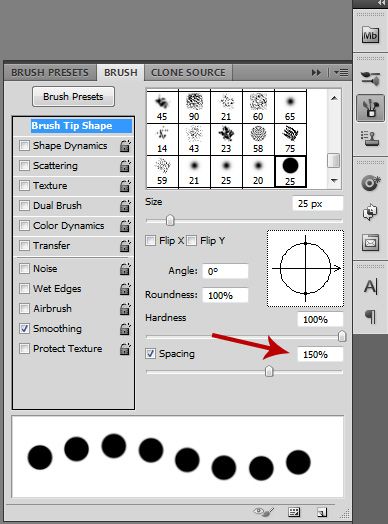
1. Select the Brush Tool (B) and set your brush size to about 25 px and the hardness to 100%. The color doesn't matter.

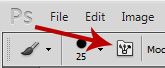
2. Find the Toggle Brush Panel icon in the upper left corner of the Photoshop screen.
3. In the Brush Panel, set the Spacing to about 150%
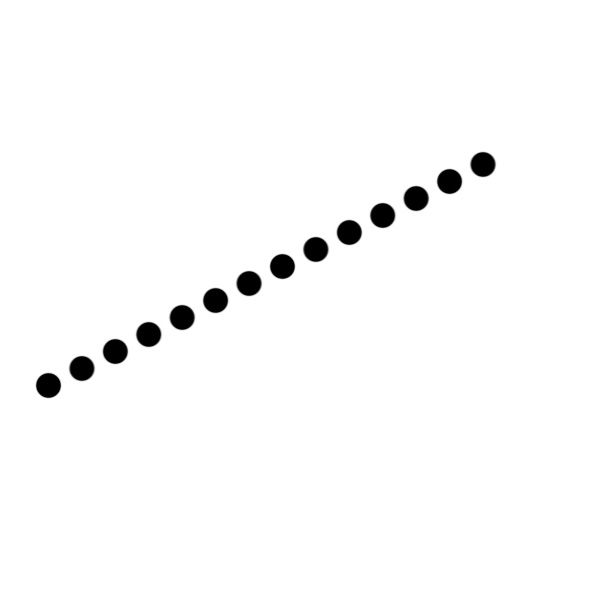
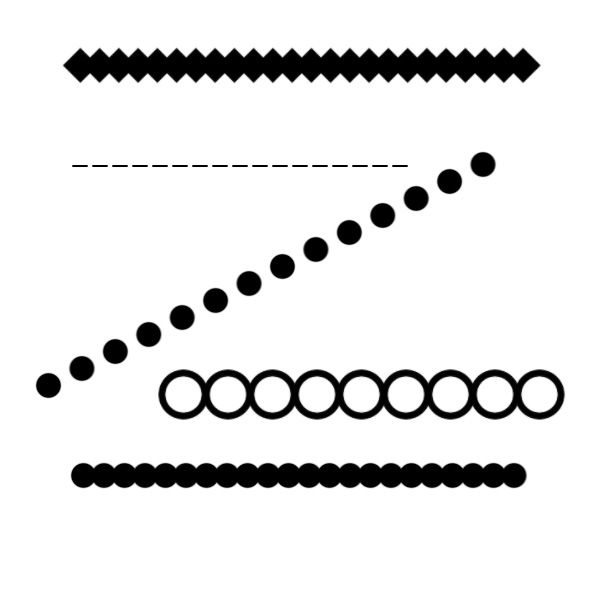
4. Open a blank canvas in Photoshop. (I'm using 600 x 600 pixels at 72 dpi) Click anywhere on the canvas to create one dot. Then hold down Shift and click somewhere on the opposite side of the canvas. You should get a perfect spaced line of dots.
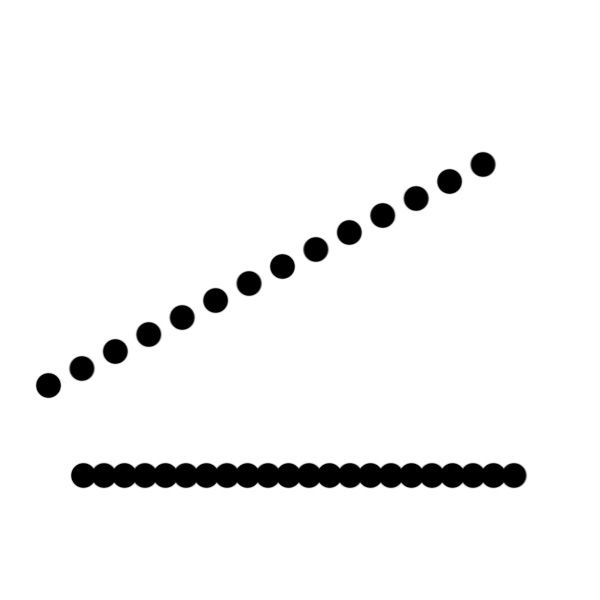
5. Now try the same thing again with your spacing set at about 80%. This time before you even click the first time, hold down Shift and click and drag across the canvas. This is a very cool trick for creating a peek of scallop underneath a layer.
and used on a layout (under the orange strip in the middle):
6. Now the cool thing is, that you can do this with any shape brush and any spacing! Here are a few other examples. Create a small square and then rotate it 45°. The brush it across the page. Or a donut shape. Or a tiny rectangle for a dashed line.
7. Now, what if you don't have a square brush or a donut shaped brush? You can create your own brush out of just about any shape.

Here we go!!!
1. Select the Brush Tool (B) and set your brush size to about 25 px and the hardness to 100%. The color doesn't matter.

2. Find the Toggle Brush Panel icon in the upper left corner of the Photoshop screen.

3. In the Brush Panel, set the Spacing to about 150%

4. Open a blank canvas in Photoshop. (I'm using 600 x 600 pixels at 72 dpi) Click anywhere on the canvas to create one dot. Then hold down Shift and click somewhere on the opposite side of the canvas. You should get a perfect spaced line of dots.

5. Now try the same thing again with your spacing set at about 80%. This time before you even click the first time, hold down Shift and click and drag across the canvas. This is a very cool trick for creating a peek of scallop underneath a layer.

and used on a layout (under the orange strip in the middle):

6. Now the cool thing is, that you can do this with any shape brush and any spacing! Here are a few other examples. Create a small square and then rotate it 45°. The brush it across the page. Or a donut shape. Or a tiny rectangle for a dashed line.

7. Now, what if you don't have a square brush or a donut shaped brush? You can create your own brush out of just about any shape.
7a. Use the shape tool (U) and create a square. (hold Shift down while dragging the rectangle shape and you'll get a perfect square)
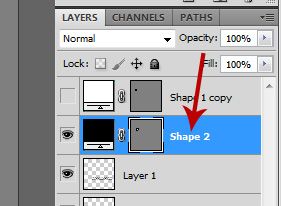
7b. Right click on the layer containing the square shape you just created (right click on the layer name, probably Shape 1 or Shape 2, etc.) and click on Rasterize Layer.

7c. Hold down CTRL and click on miniature window of the same layer. This will put marching ants around your square shape.

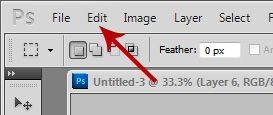
7d. Then on the top edge of your Photoshop window, click Edit, Define Brush Preset. You can name it anything you want and click OK. You've just created your own brush that you can use for the technique above.

Last edited:


")