Hello all my artsy friends! Ahhhh, it’s almost time for sunglasses to make a prominent appearance in our photos (at least here in the States). Along with those fabulous sunglasses, come the distracting reflections that often appear in the lenses. There are times when you want those reflections to show through – you might even set up the photograph to catch a particular reflection. But, there are also times when the reflections are just plain distracting to the viewer (and the page on which you are placing the photo).
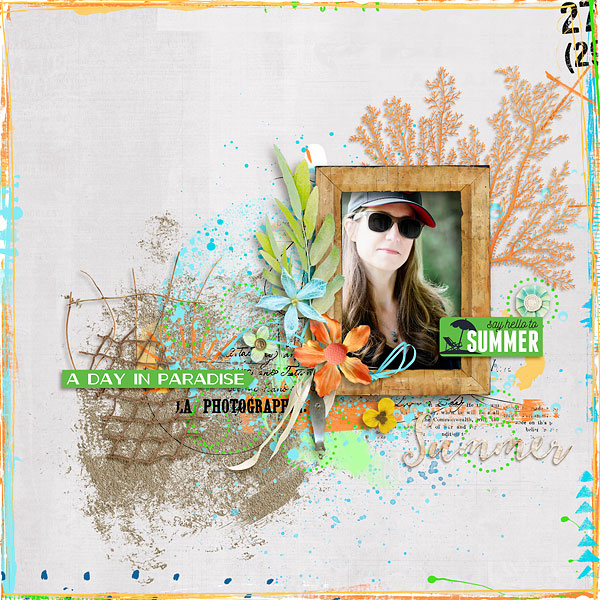
Never fear though, there is a quick fix to eliminate (or sufficiently diminish) the distracting reflections. Here is a page I recently created with a fabulous new summer kit by Little Butterfly Wings and Studio Basic Designs called Beachscape.
Here is a before and after comparison of the photo:

What a difference! Notice how the lens reflections in the Before photo are very distracting (and not particularly attractive). While there are some reflections in the After photo, they are very muted and the focus is back on the subject, as opposed to the reflections.
You too can fix distracting reflections with the following steps:
1. Create a selection of each of the glass lenses and copy them to a separate layer. I use the pen tool to create my selections, but if you’re not a fan, feel free to use your favorite method of extraction.
2. If there are particularly distracting sections of the reflection, use the clone tool to tone these sections down. In the example above, I used the clone tool to darken the snow around the left edge of the left lens. Remember, you will be darkening the entire lens, so your cloning does not have to be perfect.
3. Next, use the eyedropper tool to set the foreground color to the darkest color you can find in the lens reflection. We will be filling the lens with this color in the next step, and using a color from the lens itself will make the end result more realistic.
4. Merge the two lens selections onto one layer (if they aren’t already on the same layer). Then hit ctrl/cmd while clicking on lenses in the layer panel. This will select both lenses. With the lenses selected, click alt and the backspace key to fill the selection with the foreground color (the one you set with the eyedropper tool in Step 3). NOTE: If one lens is significantly lighter than the other, you should leave the lenses on their own separate layers (instead of combining them) and perform each of the color fill steps individually.
5. Once you have the lenses filled with color, you will want to change the layer style to something transparent to make the lenses look realistic. I generally use Multiply and reduce the opacity to between 50% and 85%. Play around with different layer styles and opacity levels to find the combination that works best with your photo. You can also add additional effects by duplicating the lens selection layer and setting it to overlay or soft light with an opacity between 15%-30%. In the photo above, I had two adjustment layers. The first one set at Multiply/60% opacity and the second one set to Soft Light/15% opacity.
And that is it! I am looking forward to seeing all of your photos showcasing those fabulous sunglasses in the gallery. :)
Until next time ~
Judie

That is such a great idea!
Great tip!