Hello scrappers, it’s Polly Heather(gw) here with my very first blog post and I’m excited to share with you how Polly Jewelle and I have been preparing for Document Your December. I would be the fly by the seat of my pants kinda girl and I basically just print and cut a bunch of goodies and gather them all together in stacks and piles… Jewelle is a very organized planner and is sharing some of her planning sketches with us today…
Do you fly by the seat of your own pants?
I was in Nashville all last week, so I didn’t get to play much with all the yummy goodies that were popping up before leaving. So, I’m going to share a little bit about what I’ve been up to the last few days as I get ready to document our December before heading out of town again for Thanksgiving. I’m also excited to share a little bit of a tutorial and some tips for the hybrid crowd too. WOOT WOOT!!! Are you ready… gonna make this quick so you can get to the tutorials…
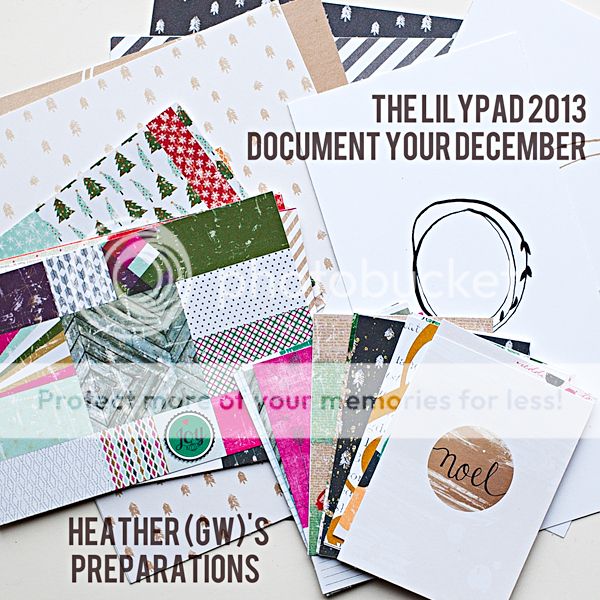
First thing I’ve done this week is pull together and print up a bunch of the 3×4″ journal cards from the DYD collection… I added some digital painty goodies from several of the DYD packs and Transparent Distressed Styles 2 by Just Jaimee… I then did the same for my 4×6″ cards, opening up Sara’s Pear Tree mini album templates and creating “foundation” cards… when I’d completed 3 of them, I put them together on an 8″x10″ canvas for printing… Lastly, I printed up the 6×8″ and 4X8″ print sheets from Paislee Press’ December, You are my fave No. 2 template set…. Then I grabbed my paper trimmer and starting cutting them and sorting them into piles by size…

After printing and cutting and putting them in piles… I went on to open up my Silhouette Software and at the end of this post you’ll find a tutorial on using a few different file types to cut up some of the other goodies you’ll find in the DYD category.
Or Are You An Organized Planner?
Polly Jewelle on the other hand is a planner and she sent me some sketches she plans on using to organize her DYD preparations and scrapping during the month… I was soooo impressed and in awe of them!!!
Here’s a look at her calendar… goodness… I love how she can plan out her whole month!!! I love all the little details she has planned for the month… from a letter to Santa to all the parties, and her own birthday and everyday activities like Gymnastics….

and here’s a look at her Sketches… oh my… these are YUMMY!!! I can’t wait to see them complete and in her book and the gallery!!!

So… you’ve had a glimpse into how different we are in our Document Your December preparations and hopefully got some ideas on how to prepare a bit ahead of time before the hustle and bustle of Thanksgiving and December and help ease the worry of not finishing or “getting behind”…
Cut File Tutorials:
Now let’s talk about my favorite “toy” and crafting tool a bit. There are so many goodies to help with hybrid preparations, some of them are must-haves like adhesive, a printer, scissors and a paper trimmer… but sometimes we just have to treat ourselves to a little extra “fun” and help. So… here’s a look at some additional preparations I’ve done using the DYD goodies…
I used Liz’s SVG cut files from her December Faves (cutting files)… I do have the Designer Edition of the Silhouette Software which is why I can use them for this first part of the tutorial… If you don’t have the Designer Edition, you can use the DXF file… the tutorial will be pretty much the same, or you can use the PNG file and follow the second part of these tutorials where I take a PNG file and trace it to make a cut file… Lastly, one of my favorite features of the Silhouette is being able to use fonts for cut files… and I’ll be using some of the yummy mobile ready fonts available in the store for some fun elements to cut!!! WOOT WOOT… let’s get started…
Using SVG files:
1) Open up your Silhouette Software
2) Open the SVG or DXF file you want to use

I wanted to make 3×4 cards instead of 6×8 pages like the cut files… but I wanted to keep the center circles the same size… so here’s how you do that…
3) Right click on the element and click on “ungroup”… I need to do this twice before it was completely ungrouped and you see grey boxes around each part…
4) Click on the 6×8 box (making sure you only have the box highlighted and not the circle elements) and delete

5) highlight all the parts of the circle element by clicking and dragging over them all
6) right click and choose “group” to make them one element again…

7) using the rectangle tool in the left hand side tool bar, draw a rectangle around your circle element… you don’t need to worry about size or getting it centered… I’ll show you how to do that in the next few steps.
8) click on the rectangle and go to the “scale” menu (make sure only the rectangle is selected, not the circle element
9) change your width to 2.9″ and your height to 4″ and make sure your “lock aspect ratio” is not checked
10) click “apply”

11) Select the circle element and go to the “cut style” menu
12) Select “cut” and you will see the SVG part of file turn red… you will also see that your rectangle is also red… this indicates what will be cut when you send it through the machine

13) Drag your cursor to select all (circle element and rectangle)
14) Go to the “Align” menu and click “center” at the top of the menu
15) while they’re still selected and now center, right-click and choose “group”

Congrats!!! You’ve adjusted the cut file to fit a 3×4″ pocket!!!
As you can see in the next part of this tutorial I’ve done the same thing two more times and now I’m going to show you how to trace and cut a PNG file…
Using a PNG file:
1) drag your PNG file over to your cutting mat in Silhouette Software, for this one I’m using Kaye’s Paper Mats – Christmas and be sure to use the black PNG and not the white one, the software will not see the white and therefore it’s impossible to trace… if you have a white element that you want to trace and cut, be sure to convert it to black before using in the Silhouette Software…
2) Go to the “Trace” menu
3) click on “Select Trace Area”
4) drag your cursor to make a box around only the png element you want to trace
5) in the menu, un-click the “High-Pass Filter” to turn it off
6) also in the menu, move the “Threshold” bar to 100%
7) only the element will be completely yellow leaving the rest of the white/transparent parts clear
8) click “Trace” in the menu

Lastly, I want to show you how easy it is to use the Mobile Ready Fonts in your Silhouette Software… this is one of my favorite features of the Silhouette, being able to cut any font you have installed on your computer!!!
Using TTF files:
1) Click on the “Font” menu
2) Choose the font you want in the menu… I chose Heather’s and Paislee Press’ Note Taker No. 1 collab.
3) Click somewhere on your “mat” and type… you can resize if you want
Voila… it’s really THAT easy to cut the Mobile Ready Fonts here in the store!

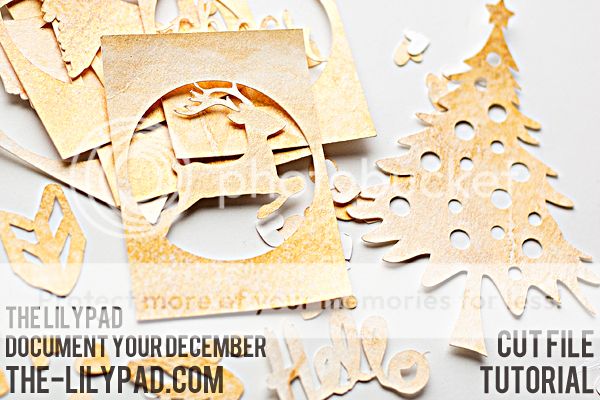
Now, I don’t like to waste paper, especially this yummy handpainted watercolor paper I made for this exact purpose of sending through the Silhouette to make lots of pretty metallic gold yummy cuts… So, I filled up my “mat” with more fonts… Heather and Emily’s Speak No. 1 and Heather and Shanna’s Gratitude Documented (used the eraser tool to erase the wording and just leave the chevron arrow)
Since watercolor paper is super thick I used the “Coverstock” setting to cut… make sure you have your blade set to the correct setting and listen to the beautiful song the Silhouette tends to make when it’s doing lots of intricate cutting…

We hope you enjoyed this inspiration and tutorial… stay tuned for more DYD inspiration and encouragement from the Pollys coming soon… and if you were inspired by this blog post, please share your goodies with us… we’d love to see!!!
I’m not sure I’ll ever get a Silhouette cutter, but day-um, this is an excellent tutorial! Now I *will* know, just in case. Lovely paper, too. I can’t believe how detailed those plans are. Wow.
I’m not sure I’ll ever get a Silhouette cutter, but day-um, this is an excellent tutorial! Now I *will* know, just in case. Lovely paper, too. I can’t believe how detailed those plans are. Wow.
(PS, that was me up above)
Thank you for the tutorial Heather! What an amazing thing to do! i never knew you could do so much with Silhouette! Bookmarking this tutorial to use when i do get my silhouette!
Thanks a lot, straight into favourites ;-) so useful