Recently there was a discussion in The Lilypad forum about Photo Organization. This is a common topic and everyone finds their own system. I got some questions about mine so thought I'd share it here.First of all, I am not a super neat person. My husband claims that I am the most "disorganized organized" person he knows. I have piles and piles of "stuff" but can always manage to put my hands on anything that is needed. It is a touch of chaos and that's just how I roll. My hard drive, on the other hand, is truly a work of art, hehe. It makes me twitchy when things are not where they belong. And again, the peanut gallery named my husband comments on that as well, saying "it seems all you do is move stuff around on your computer". HA. Well yes, I do that alot. But it makes me happy to have a small sliver of life that is completely within my control. With a demanding "real" … [Read more...]
Video Tutorial: Altering Text in Journal Cards
Today, I'm bringing you a video tutorial on altering Journal Cards to help you get the most out of your Scrap Stash! This is easy and fun and will allow you to get more use out of your awesome Card Packs. Plus, you'll be able to really personalize cards for your page or project. How great is that?As a reminder, be sure to credit the original designer of the Card when you upload these... They totally deserve the credit even if you change things up a bit.[youtube=http://youtu.be/Kj6cKdDPdZ4]Check out the Journal Card section of The Lilypad Store for a ton of cards to get you started. And I'm hoping this will help you breathe new life into come JC packs you already own.And here are the links to the products used in this tutorial...Let me know what you think and I'd love to see some altered cards! … [Read more...]
Tutorial: Blending Cards and Papers for a Different Look
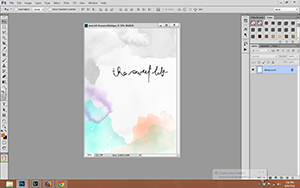
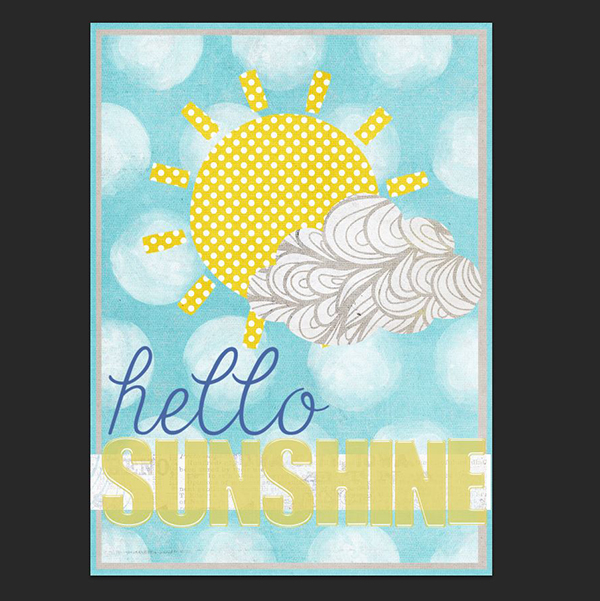
Experimenting with digital mixed media techniques has been so fun for me lately. So fun, in fact, that I've had a hard time finding ways to use all of the graphic journal cards I've purchased along the way. That was until I started blending them to create different cards! Now I can take the graphic cards I love and give them a mixed media look in just a few easy steps. Check it out!Step 1: Open a card you want to start with. I usually start with a simple card that's white based with some black writing or art. On this card by Emily, the watercolor will add to the final effect.Step 2: Choose a paper you want to use. For this tutorial I am using the Pink Reptile Drawn To You Papers. I also often use painted papers when I am doing this technique.Step 3: Drag the paper on top of the journal card, creating a layer above the card with the paper.Step 4: Duplicate the … [Read more...]
Quick Tip: Video Tutorial for Photo Blending

Photo blending. I know, it makes some of us want to run away screaming like Godzilla is hot on our heels. When it comes up in a Speed Scrap, we shake our fists at the Digi-Scrap world and say "WHY? WHY?". When it's mentioned in a Challenge, we bury our heads in our hands and cry out to the Gods of Scrap about the inhumanity of it all. (OK, maybe that is a bit dramatic, but you get the idea).All that is gonna change today! Blending a photo into a background, or into another photo can be done in many ways, as with most scrappy endeavors. I'm gonna briefly show you one way. It's so quick and fun that you are going to seriously kick yourself for your initial fear and anger over the thought of the task. And, hopefully, you will have just one more tip in your creative arsenal. Psst... I won't tell anyone that you were once a chicken. … [Read more...]
Hybrid Tutorial: Shaker Cards
Cards are one of my favorite hybrid projects to create. Those who are not familiar with card making may not know of all the different varieties of hybrid cards you can make. I've been trying out so many lately and I wanted to share a type of card that I have fell in love with. Shaker cards. At first glance shaker cards seem very elaborate and hard to make. Not so! Today I'm going to show you with a short tutorial how easy it is to make a shaker card.Supplies Needed: Forget Me Not | Papers by Pink Reptile Designs Signs of Spring by Kate Hadfield Designs Peek A Boo Alphabet {element pack} by Laurie Ann Pre-folded Card Transparent material {plastic bag, sheet protector, transparency, etc} Sequins/Confetti Adhesive Additional embellishments (optional) Scissors/exacto knife/Silhouette Cameo1. Begin by designing the base of your card in Photoshop. I used … [Read more...]
Down & Dirty Masks (drawn by hand)
Masks are cool. Once you figure out "Control-G" on PSE (and the clipping function on PS), it's The World is Your Oyster! Photos, papers, all kinds of digital stuff can be clipped to them. You can use them as an element unto themselves as backgrounds to images.In this case, I figured I'd draw and scribble a mask of my own on paper, and then digitize it.This is the shape I scribbled:A simple triangle shaded in with a pencil. It's not incredibly elegant, but it does have some terrific texture! You can go ahead and grab this if you want and do your own thing with it. :-)The trick is to increase the contrast between your scribble and the paper so that when you magic wand and delete the white paper background (with a transparent layer under it) the edges will come out pretty clean. Or as clean as you want it. And save as a .PNG file to keep that new transparency.Here's an … [Read more...]
Quick Tip: Sharpen for Web
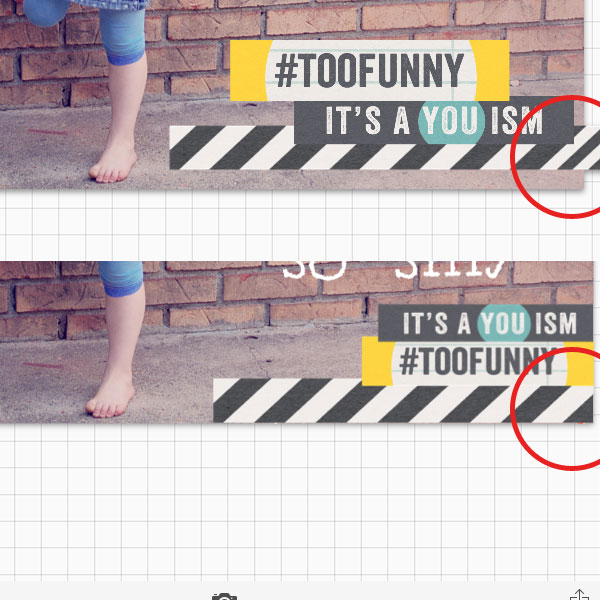
So, I was digi scrapping for years before I found this little trick. And it seriously changed my life. OK, maybe that's a teeny exaggeration but it did make me happy. My pages were not the "blurry" ones in the forum or gallery any more. Yay, me. I know there are many ways to sharpen your images in preparation for web view, including some actions that can be used, but this is what I do. It adds 2 steps to my saving process and is well worth it to me. I've decided to show this little tip to you with video tutorials using both PSE11 and PS CC, so bear with me if I say "um" 100 times. For Photoshop Elements: [youtube=http://youtu.be/TznPA9iDzNg] For Photoshop Creative Cloud:[youtube=http://youtu.be/IKxJ8jRKfMY] Hope you learned a new trick and I'd love to hear how you are doing this as well. Leave me a comment! … [Read more...]
Tutorial: how to digitally tear a photo

I love the look of old photos. I've been working on a project and have scanned a ton of old photos. Most of them have been well preserved, but sometimes, I wish they looked their age. One advantage of the digital age is that I can age my photos, or even "tear" them, without actually harming the original photo. Today, I'm going to show you how to tear a photo. You can leave the torn piece, off to the side, or delete it complete. This works great with papers too. Disclaimer: This tutorial is done in Adobe Photoshop, so I can not guarantee that other programs will have the same effects. 1- Create a new document 12x12 300dpi 2- Drag your photo over3- Using the lasso tool, select a rough edge of a part of the photo you'd like to "tear off".Next, add a layer mask. Click on the icon that looks like a box with a circle in it. You want the mask to look … [Read more...]
Tutorial: Using PNG’s in Mobile Apps
I have a great little tutorial to share with you today. I absolutely LOVE the TLP line of Mobile Ready Fonts, but sometimes I want to add a little more to my photos without starting up Photoshop. Some of my favorite parts of digital kits are all the fun little wordy bits and I knew there just had to be a way to add them to my photos directly from my phone. So I started experimenting and you know what?!?!? It worked! And now I can share what I learned with all of you :)What You Need*:Mobile PhoneDropboxPhontoA few of your favorite TLP Elements in PNG formatTo start you will need to upload a few elements into Dropbox from your computer. I am using bits from Stated Elements by Sara Gleason.Open Dropbox on your mobile device and save each element to your camera roll. I like to double check that all of my photos saved correctly before I open Phonto. You may notice that the background of some … [Read more...]
Tutorial: How to create your own overlay
How to create your own OverlayBy Dalis AcevedoHi everyone! If you have ever played with me in the Art Journal section of our forum you know that I am fascinated and a bit obsessed with transparent Overlays. They are fun and can add just the finishing touches or starting touches to a page. Overlays are NOT only used in Art Journal but in any page or project. Create your own Overlay by using a mix of brushes and or png files to create more texture or interest in your page. After you create your overlay then just use some color to make it look like paint or clip a paper to it to blend it.I created a video tutorial for you. In this tutorial I am using Photoshop CS5 but the steps can be translated to most of the other programs.Let me show you my before and after pictures of my page so you can see the difference an Overlay can make in your page.Final … [Read more...]