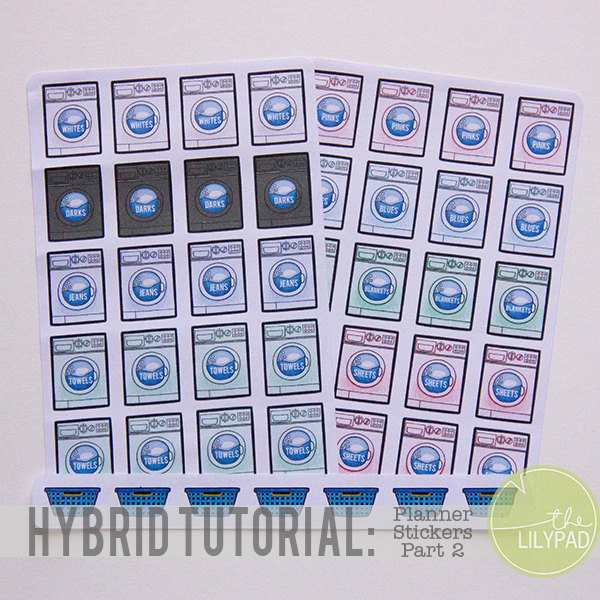
I can't get enough of planner stickers! Last month I showed how to make planner stickers from digital supplies. While I really enjoyed my stickers I was getting a little frustrated with having to hand cut out each sticker out. I knew my silhouette machine must be able to solve the problem. Today I have tutorial showing you how to "kiss cut" your stickers and create a sticker sheet on your silhouette machine.1. Open up a blank document in your silhouette software. Determine the size of sticker sheets you want. Create your sticker sheet using the rounded rectangle tool. I chose 4" x 6" for my sticker sheets. I also added a few thinner rounded rectangles to fill in the spaces around my sticker sheets. I did this so that I don't waste any of my sticker paper.2. Select all of your rounded rectangles. Go to the line color window at the top of the screen. Change your line … [Read more...]
Create a Card – Baby Edition

I really enjoy giving cards to family and friends. Cards are perfect way to send birthday wishes, celebrate a special event, or even to just say hello to someone. I always try to have a selection of homemade cards on hand to give out for any of these occasions. I've noticed my supply of cards has been getting a bit low and committed myself to making a few cards to bolster it up. Today I'm going to show you a step by step tutorial on how to create a cute baby card to add to your stash of homemade cards.To make this card you will need the following supplies: Boxed In 2 Template Duo by Gina Miller Reverie {papers} by Sara Gleason Accident Prone | Papers by Pink Reptile Designs Oh Baby Papers by Quirky Heart Oh Baby Elements by Quirky Heart Presentation Paper Card base Cutting Machine or scissors Extra embellishments Glue or tape runner Foam … [Read more...]
Making Planner Stickers from Digital Supplies

I love planners! I've had some kind of a paper planner since 8th grade. Planners keep me focused and on top of all the things a busy mom/wife/crafter has to keep track of. In the past six months paper planners have really caught on with the scrapping community. But of course we as scrappers are taking planners to a whole new level by decorating our planner pages. Today I have a short tutorial to show you how you can make stickers for your planner using some of your digital supplies.1. Select the type of sticker you want to make and also the digi supplies you want to use . I chose to make some weather and water stickers for tracking in my planner. For this I chose Signs of Spring and Shaping Up by Kate Hadfield. Her doodles make perfect stickers!2. Open a 8.5" x 11" document in Photoshop. Place the elements that you want to make into stickers on the document. … [Read more...]
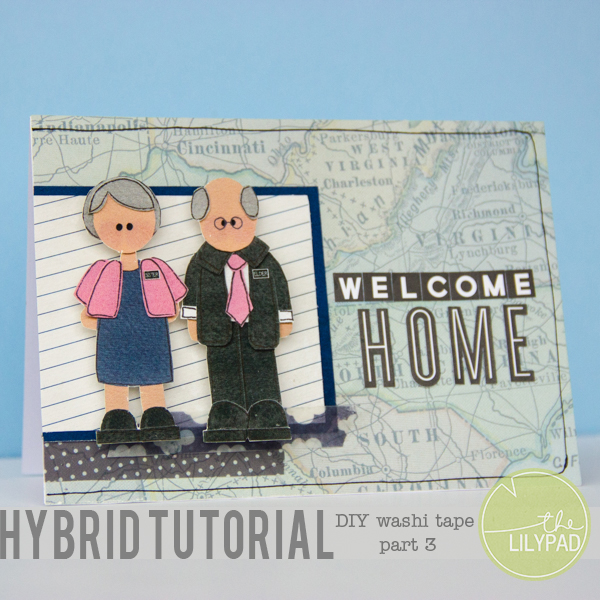
Hybrid Tutorial: DIY washi tape part 3
Hello scrappers! I’m back with part two of the DIY washi tape series! Lets review quickly the three ways I will be displaying how to make your washi tape. Using Avery labels Using sticker paper Using digital washi tape on sticker paperIf you missed part 1 or 2 be sure and click on the links above to go back and learn more ways to make your own washi tape. Today we are going to learn about using digital washi tape on sticker paper. This is my favorite way to make hybrid washi tape because I make the exact amount of washi tape I need with absolutely no leftovers. It also is very simple to make this washi tape. Let me show you how!1. Open up a 8.5″ x 11″ blank document in Photoshop.2. Open up several of your favorite digi washi tape and resize them. This is done so your hybrid washi tape will be the same size as traditional washi tape. I resized my pieces of tape … [Read more...]
Marshmallow Snowman Tutorial
Hi Happy Scrappers!Polly Liana here, with a quick tutorial about how to construct adorable snowmen out of marshmallows. It's the perfect craft for a child's party-- in fact, we're making these for my daughter's fifth birthday this weekend. Follow along and you'll be hanging out with these fine fluffy fellows in no time!Here's what you will need:bamboo skewersmarshmallows (full size)mini chocolate chipsOreosdark chocolate mini Reeces peanut butter cupsdark chocolate frostingorange tictacsred gel icingTwizzlersskinny pretzelscheese picks or a similar thin, sharp stick (toothpicks would probably work)(it would also be helpful to have some pieces of styrofoam, paper plates and small rubber bands)Here's how to construct them:1. slide three marshmallows on to the skewer, then wrap a rubber band right below the bottom marshmallow to keep them from slipping. … [Read more...]
How To: Vinyl Wall Art

I love changing the decor in my home to reflect the seasons and the holidays. I really like finding ways to use my stash to create fun, new, removable wall decals at home using decor vinyl and my silhouette portrait. After a little learning and some trial and error, I've come up with this tutorial to help you do the same, so here is 'How To: Vinyl Wall Art!'STEP 1: Choose and prepare your element!Decide which element you'd like to use to create your wall art piece. I decided on this fun Christmas Tree doodle from Little Butterfly Wings 'Xmas Doodles' pack for DYD. I had a spot on my wall in mind right by our console table & shoe storage unit in the hallway and realised I didn't need the lovely writing this time, so I cropped it out.Once I'd cropped the writing out, I was left with exactly what I wanted for my wall art (see above). Then I chose to 'save for web' as a PNG … [Read more...]
Pocket Scrapping Art Journaling Process

Hi everyone, Sarah here, and I thought it would be fun to talk about the process I used to create my pocket page for the Pocket Scrapping Art Journaling challenge today.I decided that this 123 Art collab by Kaye Winiecki and Studio Basic would be a fun kit to work with to create a collage.My first step was to choose elements that I thought would work well for my page and open them up in my Silhouette Studio software. I did a print and cut on the elements that I wanted. You can certainly cut most of these things fairly easily with a good pair of microtip scissors and a craft knife but I love what a timesaver the Silhouette has become for me.My next step was to decide what papers I wanted to use for my cards. I began by opening an 8x10 canvas. I then chose the paint swatch card for one of my pockets and chose two other papers that I cropped down, one at 4x6 and the … [Read more...]
Hybrid Tutorial: DIY washi tape part 2
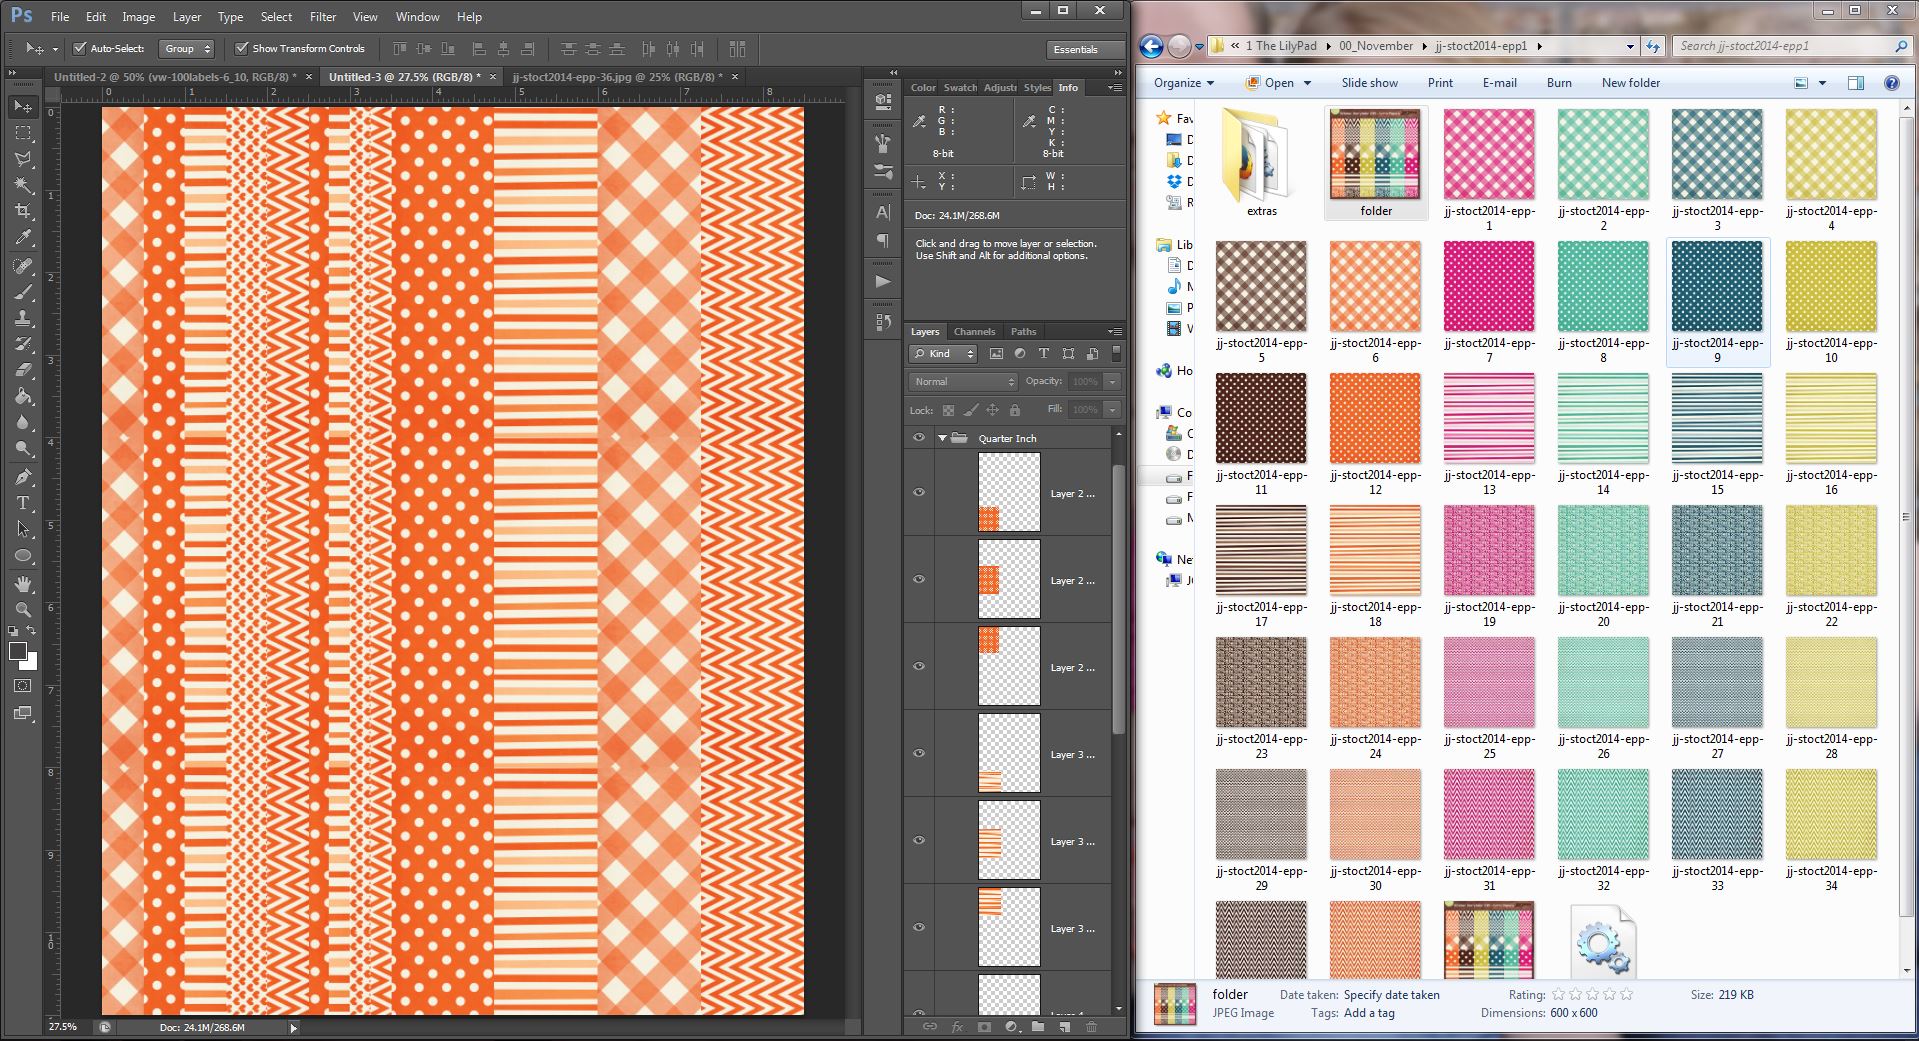
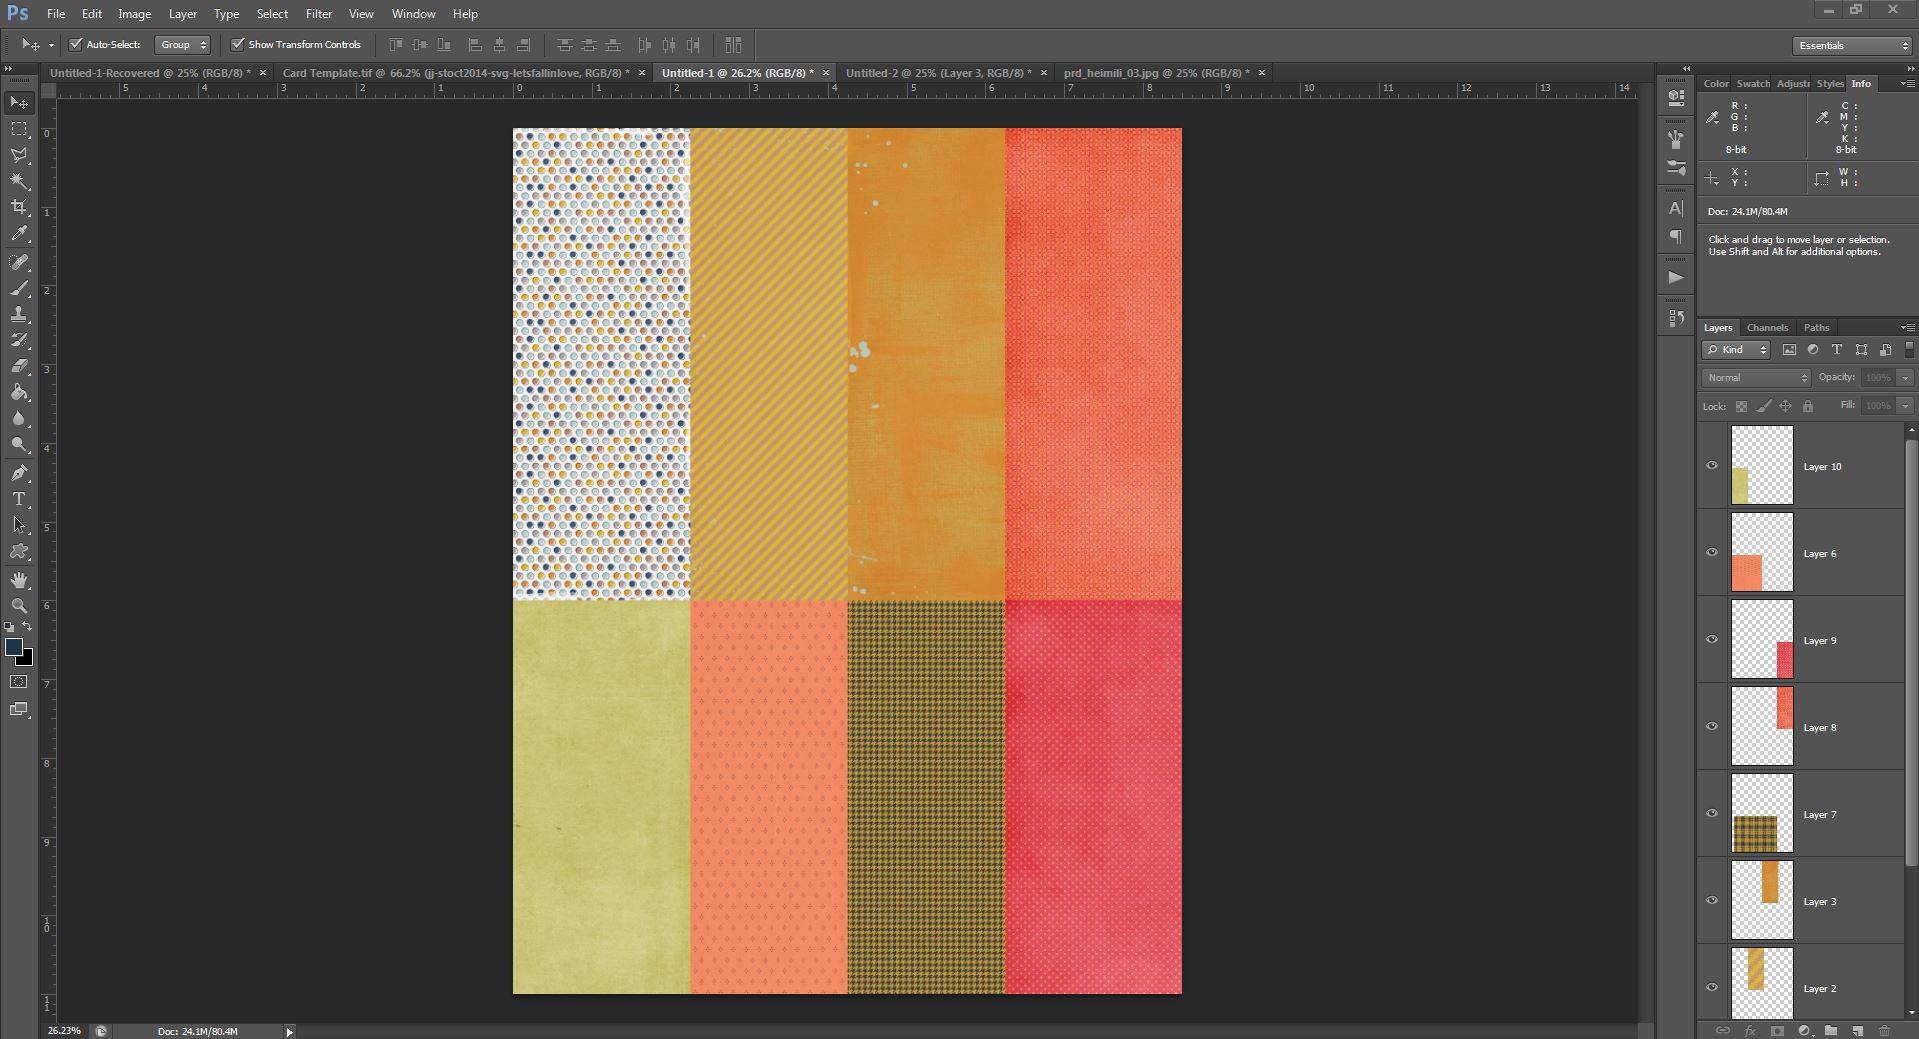
Hello scrappers! I'm back with part two of the DIY washi tape series! Lets review quickly the three ways I will be displaying how to make your washi tape. Using Avery labels Using sticker paper Using digital washi tape on sticker paperIf you missed part 1 be sure and click on the link above to go back and learn about using Avery labels. Today we are going to learn about using sticker paper to create your own washi. One reason that I enjoy using sticker paper to make my washi tape is that I'm not limited by size. I can make a variety of widths of washi tape all on the same sheet of sticker paper. Let me show you how!1. Open up a 8.5″ x 11″ blank document in Photoshop.2. Open up several of your favorite digi papers and resize them. This is done so your patterns will be to scale on your washi tape. I used papers from Storyteller October 2014 - Extra Papers by … [Read more...]
Hybrid Tutorial: DIY washi tape part 1
Hello scrappers! Have you noticed that the trend of washi tape is still around and going strong? I love to use washi tape on my digi layouts and also my hybrid creations. However, washi tape is really hard to find in my area (for my hybrid creations) and I don't always want a huge roll when I do find some. Because of this I have started to make my own washi tape using digital supplies! I have found three ways to make washi tape. They are: Using Avery labels Using sticker paper Using digital washi tape on sticker paperOver the next couple of weeks I am going to do a tutorial on how to use each of these techniques to make do-it-yourself washi! I'll also provide an example of how I used the washi on a project of my own. All three techniques are useful in different ways, so I thought I would show how to use them in different ways. Lets get started on our tutorial!1. … [Read more...]
Organizing from Dropbox to Lightroom to Bliss
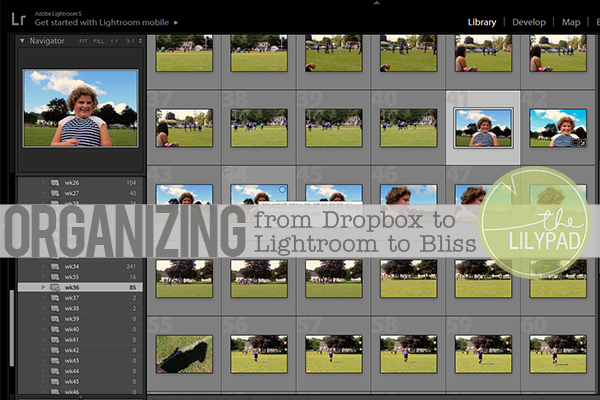
I like to organize things. In fact, I spend way more time organizing things than I really should. When I first started my pocket scrapping project, I would spend hours uploading, sorting, moving and tagging my photos. This took up the majority of the time I spent at my computer. I knew that if I was to keep up the project, I would need to find a way to make this whole process a lot easier.First, I got Lightroom all set up. I found that in Lightroom, you could create Smart Collections that would pull all the pictures that were captured within a certain date range. To create the Smart Collection, click the + next to the collections tab and choose "smart collection." You can go ahead and name the smart collection, I made it simple and named each collection by the week. You can leave it to match "all" and then from the drop down, pick "capture date." Once you've done this, you need to … [Read more...]