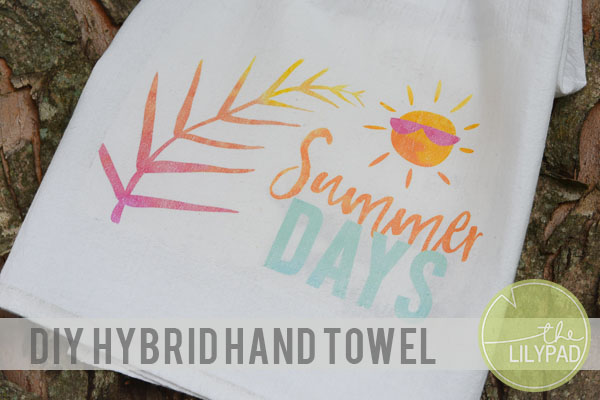
Hi Pad Peeps!! It's Katrina here today to share a tutorial on how to use your digital supplies to make custom hand towels for your kitchen, camper, or gifts (think ahead to Christmas!!). It's pretty easy, but I wouldn't recommend this as a kid friendly project, just for the hot iron. But they could always help you time the steps!Supplies you will need of this project are: Digital editing/printing program aka Photoshop for me! Cotton tea towel. I picked up a pack of two at a local craft store and used a coupon for a deal! Digital elements of your choice Inkjet printer Iron Inkjet Transfer Sheets (I used Therm O Web brand)You will want to wash and dry your towels before putting the transfer on them. This will get chemicals out of the towels and also if shrinkage happens, it won't affect your design.Start off by creating a document in Photoshop at … [Read more...]
Clustering vs. Layering: Knowing the Difference
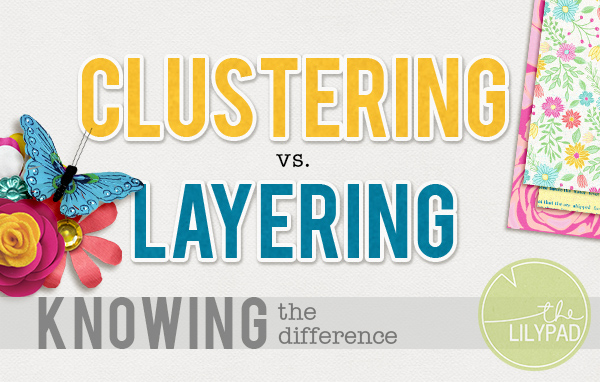
Often, people use the digital scrapbooking terms “clustering” and “layering” interchangeably. Is this really true, though? Are clustering and layering the same digital scrapbooking technique?The answer is no, clustering and layering are not the same technique. In fact, they are two techniques that can provide very different looks on your layouts. In order to improve both techniques, first, we need to know the differences between them.ClusteringClustering is a technique that I use very often on my digital scrapbooking layouts. Clustering is the process of taking digital scrapbooking elements and arranging them into small clusters in different areas of your layout. For example, you might put a cluster of five different flowers at one of the corners of your layout. Clustering is also often achieved by combining a number of different elements into clusters on the page. … [Read more...]
Power Scrapping My Disney Album

I love when we can all discuss topics and share ideas, both old and new. That exact thing happened this past week in the forums.I had posted about my blog post 5 Ways to Get More Out of Your Kits, and everyone was chiming in on tips they use for working with their kits. Then, Kristina mentioned Power Scrapping. I knew of the term but wasn't sure we were talking about the same thing. Much to my surprise, when I asked her, she shared a blog post I had written here two years ago about Power Scrapping. You can check out that post here:Catching Up on PL 2015 in One Hour a DayBasically, Power Scrapping is batching tasks that you do when you complete a page. It often works for larger album projects like Project Life. So first you may choose and place all the photos, then you might put all the cards or paper on each page, etc. I had originally learned the technique from Katie the … [Read more...]
Straw Rockets For The 4th

Hi there, it's Katrina, aka katrinahunt13, here to share a hybrid project that you can get the kids involved with. I know we have international pad members, but this coming Tuesday is the United States 4th of July, which means summer party! Summer parties, usually mean gatherings of kids too! What I am sharing today is a fun and safe way for the little ones to "shoot" fireworks also. And bonus, they don't need to wait until dark and they won't run out of things to shoot!I give you Straw Rockets!!! I will list the supply list below, but chances are you have everything already on hand! And the digital supplies from The Lilypad store are fun to use this way and can be adapted for any party or activity! For this project, I used Bella Gypsy's Rad, White and Blue collection. So the supplies you will need are a printer and regular printer paper (cardstock is too heavy for this), … [Read more...]
Recreating Painterly and Blended Background Photo [with video]
![Recreating Painterly and Blended Background Photo [with video]](https://the-lilypad.com/wp-content/uploads/2016/11/thelilypad_blendedbackgroundphoto-600x533.jpg)
Hey everyone! I thought I would do a quick post on how I did the photo blending on my background on this page with the November 2016 awesome M3. A lot of this was learned from Jana and the November 2016 Champions at Scrapaneers (which featured an awesome kit of Lynn's!).First off you are going to need a smart phone, or know how to recreate your own pencil like sketching in your photo editing software. I used the Prisma App for both of my photos editing but for this little tutorial, I am going to focus on the blended background photo.Open your photo in Prisma and you will find all kinds of fun filters to create painting/drawing effects on your photos. These change regularly! So if there is one that you like edit a bunch of photos with it and save them because it might not be there long!For my photo I ran the #GettUrban filter. I wanted to keep some of the blue of … [Read more...]
Simplifying Planner Decorations
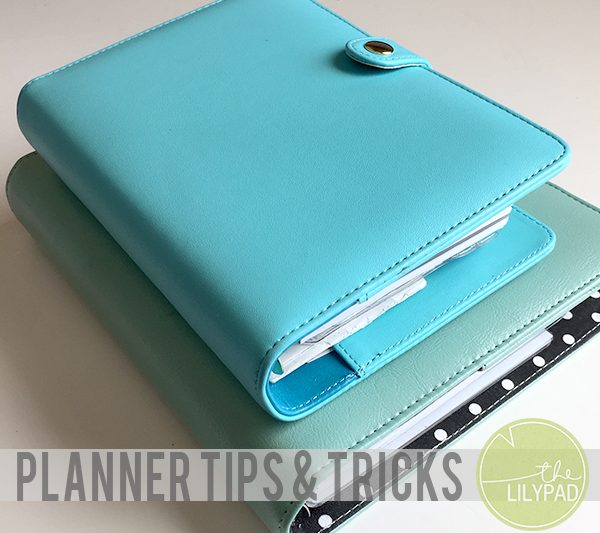
Hey all! Polly Jewelle back with another quick planner tip! Today I want to expound on how to simplify your planner decorations, specifically when syncing two planners. Today I have 3 tips for simplifying your decorations. Use one kit - Kit does not mean scrapbooking kit. I'm using the term kit to loosely mean one set of supplies. I create a mini planning kit for myself each month using kits from The LilyPad Designers. Within this kit I make sure I have elements that will fit in both my planners. A simple way of doing this is to simply resize what you have made for the larger planner. Now what ever you use in one planner matches in the other planner. They "go" together! This month I used Classic Boo 2 by Forever Joy Designs. I also used Spooky Street, Halloweenies 2, We Be Pirates, and Zombeenies by Kate Hadfield. Can you see my two different sizes of labels, ghosts, … [Read more...]