I love planners! I’ve had some kind of a paper planner since 8th grade. Planners keep me focused and on top of all the things a busy mom/wife/crafter has to keep track of. In the past six months paper planners have really caught on with the scrapping community. But of course we as scrappers are taking planners to a whole new level by decorating our planner pages. Today I have a short tutorial to show you how you can make stickers for your planner using some of your digital supplies.

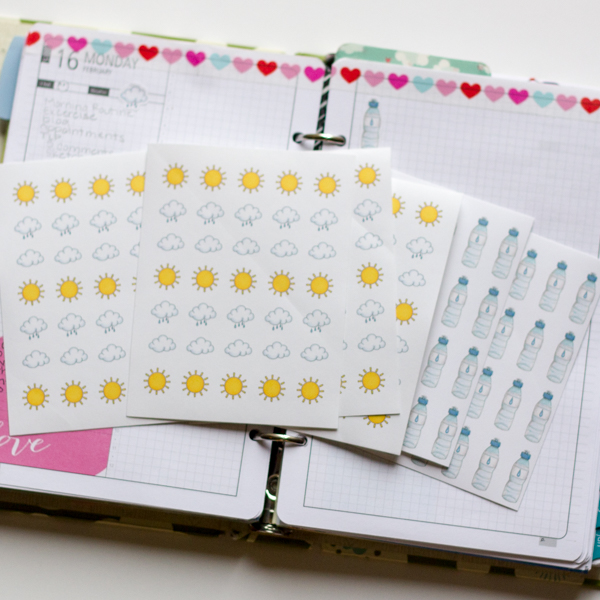
1. Select the type of sticker you want to make and also the digi supplies you want to use . I chose to make some weather and water stickers for tracking in my planner. For this I chose Signs of Spring and Shaping Up by Kate Hadfield. Her doodles make perfect stickers!
2. Open a 8.5″ x 11″ document in Photoshop. Place the elements that you want to make into stickers on the document. Resize the elements to be sticker size (about .5″ – 1″), and then duplicate the elements to fill the page. To fit more elements on a page you can use the align and distribute tools to space them evenly. Be aware as you place these elements that you will need to give yourself enough room to cut them apart. Here is what my document looked like in photoshop.

3. Print your stickers on white sticker paper. Cut the stickers apart using scissors or a paper trimmer. You could also have your Silhouette machine cut these for you using the print and cut feature. I chose to use my paper trimmer this time. I cut my stickers into four sections and plan to use scissors to cut a rectangle around each sticker when I need it. You can see in my picture below not only my sheets of stickers, but also how I used the stickers.
I hope you have enjoyed this tutorial and found it useful! Be sure and share any planner stickers you make with us! We love to see your creations in TLP gallery!
[…] Making Planner Stickers from Digital Supplies – 1 freebie(s)? […]