Hello everyone and Happy June! For many of us that means we are full on into the Summer season and times busy with activities, travel and general summer adventures – which can equate to less scrapping/creative time. I’m here today with a couple of tips on how to creatively use paint-like elements in templates to make the most of your scrapping time.
It is that time of the week again – time for the “oh so awesome” SOSN sale where you can pick up some amazing digital goodies at 50% off. Fiddle-Dee-Dee has some awesome templates (Life is Lovely DU and DD) in the sale today that have some very versatile paint-like elements. When you see these types of elements on templates, you might wonder what to do with them. Do you replace them with paint elements from kits or use them as is? What if the colors on the template don’t match the kit you are using and you can’t find any coordinating paint elements? No worries! These types of elements can be customized to match your page design, and I am going to share a few of my favorite ways with you today.
Take a look at how I used the paint elements on this page (made with kits in today’s SOSN sale):
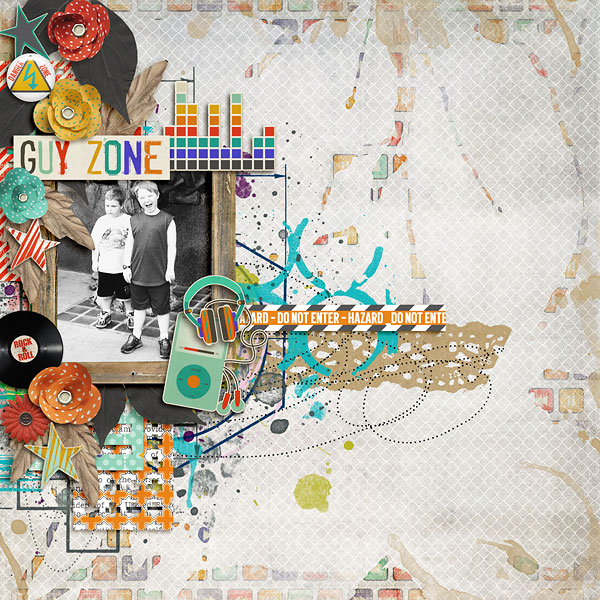
I customized the paint elements in two different ways:
First, I clipped a patterned paper to one of them. This is such an easy and unique way to add patterns to your page. Because the paint elements are lower in opacity, the patterns you use will easily blend into the background. To clip a paper to an element, bring it onto the page just above the paint element and then use the shortcut Ctrl>Alt>G (make sure the paper layer is selected).
Second, I recolored one of the paint elements to match the colors in the kits I was using. Recoloring is another super-easy way to customize paint elements to your color palette.
To recolor an element in Photoshop, click on the Create New Fill or Adjustment Layer icon (the half-filled circle) at the bottom of the layers palette and choose Solid color in the pop up menu:

When the color picker appears, use the eyedropper tool to click on a color in your layout. You can try out different colors to see which one you like the best. Once you have your color of choice, click on OK in the color picker panel. Finally, clip the color adjustment layer to the paint element (Ctrl>Alt>G).
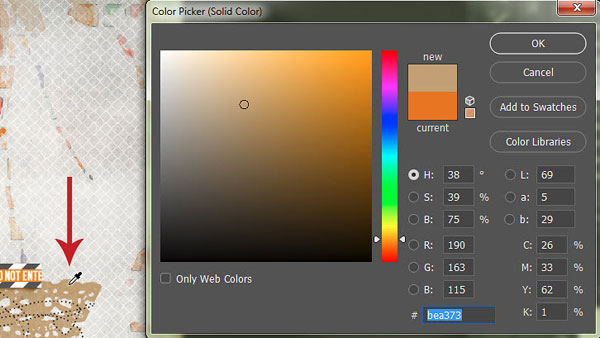
If you want to change the color later, just click on the color adjustment box in the layers panel and the color picker tool will reappear. Here is what my layers panel looks like:

Some other ideas include:
1. Clipping other paint elements to the ones on the template. This creates a very artsy and more random effect than using papers.
2. If you want a more texturized solid color, clip solid papers to the paint elements.
3. You can also use the paint elements as photo masks – either with a focal photo or to add a montage of different photos to the background.
4. Another tip for using photos is to look for non-traditional subjects in the photos. For example, clip photos of the sky to a paint element to create an ethereal effect. Or may photos (or parts of photos) including grass or water to ground the page.
5. Finally, get creative with the recoloring and use the gradient tool to add some pizzaz to the paint element.
The possibilities are endless! Keep in mind that if you really like the shape and design of a paint element (either the original, or one you create) you can save it as its own element (in PNG format) and use it on other pages. I love doing this with my favorite template elements.
I hope you have fun playing with some painty elements today!
Until next time ~
Judie (HeyJude)

Leave a Reply