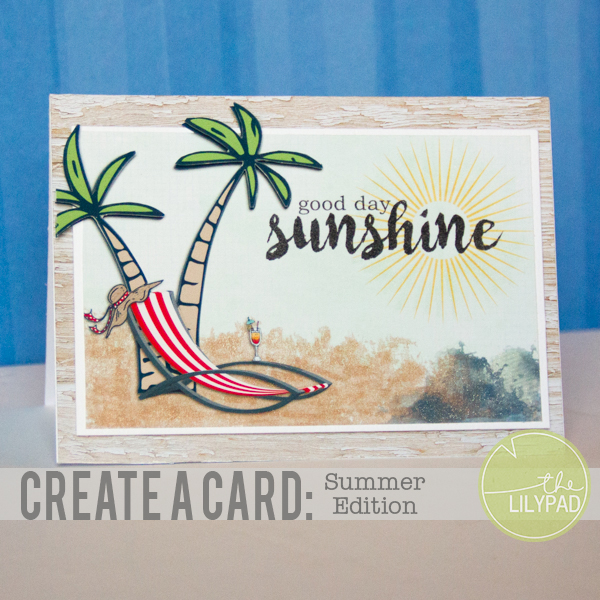
I really enjoy giving cards to family and friends. Cards are perfect way to send birthday wishes, celebrate a special event, or even to just say hello to someone. I always try to have a selection of homemade cards on hand to give out for any of these occasions. I’ve noticed my supply of cards has been getting a bit low and committed myself to making a few cards to bolster it up. Today I’m going to share a summer card I created and a tip for creating dimension on your card. This tip is meant to help those who are a bit afraid of hybrid crafting. It is simple but adds a huge effect to your cards.
To make this card you will need the following supplies:
- O Sole Mio | Papers by Pink Reptile Designs
- O Sole Mio | Elements by Pink Reptile Designs
- Presentation Paper
- Card base
- Scissors
- Glue or tape runner
- Foam adhesive
1. Using papers and embellishments from Pink Reptile Designs kit create your card design.
2. Duplicate all layers of your card to a new 8.5 in x 11 in document. Spread the pieces of your card out so they are not touching. Select pieces of the card design that you want to add additional dimension to and duplicate these images. Again spread the pieces out so they are not touching. Print this sheet and use your scissors to cut out the card pieces.
3. Assemble your card using your original file as a guide. Add additional embellishments as needed. Place foam adhesive on the back of your “duplicate pieces.” Place these pieces directly on top of their duplicate.
4. Add additional embellishments as needed.
All finished! With just that one simple step you have taken a flat hybrid card to the next level.

I hope you’ve enjoyed this short tutorial! Stay tuned next month for another Create a Card Tutorial. Be sure and share any cards you make with us! We love to see your creations in TLP gallery!
Leave a Reply