Learning how to create a mask is easy. By blending a variety of brushes, overlays, etc you can create your own artsy mask. Let me show you how, using Photoshop.
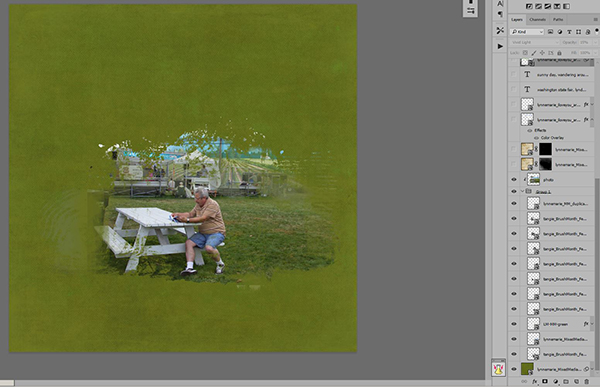
Here’s a screen shot of my layout with my layers of brushes which were combined to make a mask for my photo. I’ve turned off all the other layers except for the background layer so you can see the completed mask with the photo clipped to it before I finished off the page. I used brushes from Tangie Baxter’s 2017 Brush Of The Month Club February Brushes and Lynne-Marie’s Mixed Media kit.
How I start my mask building is to first select the photo I will use so I can get a sense of the shape of mask I want to create. Then I turn down the opacity of the photo layer so that I can see through it to the mask layers below as I create them. This step isn’t necessary and by no means do you need to select a photo first, this is just my preferred method. Open an overlay or brush file (png), or create a new layer and select a brush to stamp onto your page, whichever you prefer. This needs to be on the layer below your photo. Now the additional layers can be created with brushes or overlays (whatever you want to include in your mask shape). Each layer can be resized and warped as needed to fit into the shape you desire. You can also duplicate mask layers (I prefer to use ALT, click on layer and drag, then release, which will create a new duplicate layer) which I often do, then moving them around to increase density or to add to the outer edges.
With your cursor, select the layers you will use for a mask and group them together by pressing CONTROL key + G. Now press ALT while hovering between the two layers (photo layer and group layer) and click which will clip the photo to the mask. At this point, if you want to add additional layers into your mask, be sure to place the layer below your photo layer. If you accidentally unclip your photo just repeat the above steps for clipping your photo.
Your layer mask may also include any element or paper, get creative and play around with it. Adding a flourish or text also creates an interesting mask.
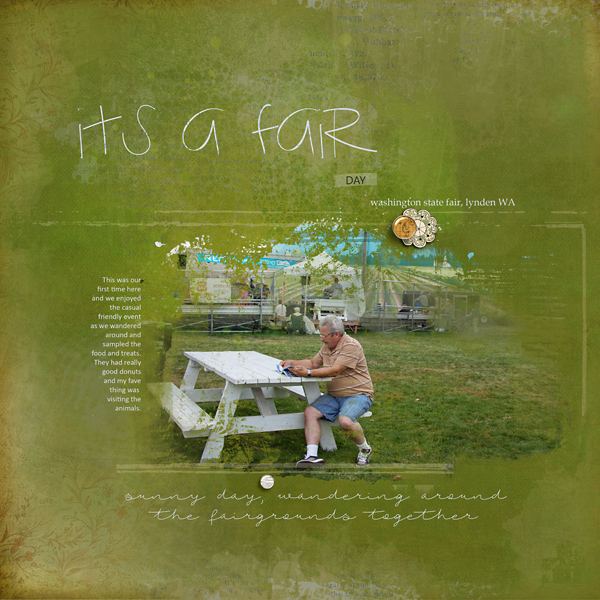
I completed my page design and here is the finished layout.
I hope I have inspired you to create masks and discover how versatile they are in your page design!
Thanks for this! I need to work on this because I love seeing how others use this technique so well.
I do pretty much the same thing when I want to create a mask, but would always merge (CTRL + E) the brushes so that I could clip my photo to it. I never thought about creating a group for the brushes and then clip the photo to the group. Can’t wait to try this out! This is so much more forgiving than what I would do. You have made my day.