Journal cards are very versatile. One of my fave ways to use them is to remove the text and use it separate from the card. Let me show you a number of ways you can do this.
Here are some journal cards and the text that I have removed from the cards, using these products:
Paislee Press – A Love Story Journal Cards
Just Jaimee – Storyteller 2016 July – 6 x 4 Pocket Journal Cards
Amy Wolff Designs – Jot It Down Vol.4
One Little Bird – Carson Park Journaling Cards
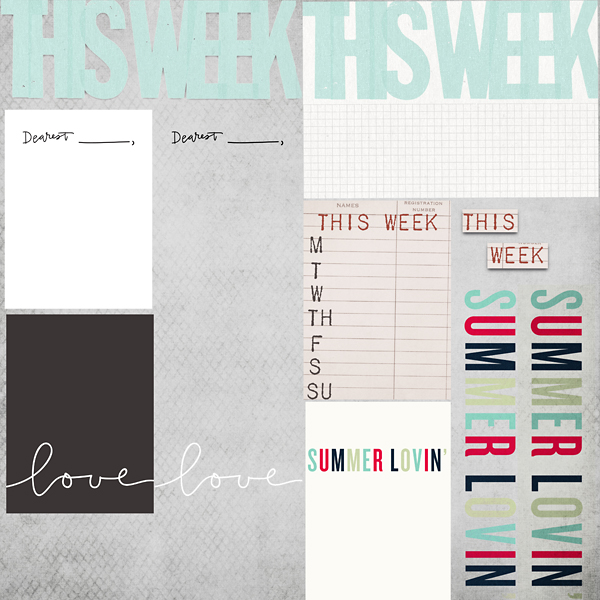
In photoshop, I selected the magic wand and and selected “this week”, then I inverted the selection (select>inverse). I right clicked and chose “layer via copy” to put the selected text on its own layer. The orginal layer can then be deleted or you can unclick the layer if you think you might want to activate it again to use another part of the journal card (this is what I do because I never know exactly what I want to do in my page design and therefore may go back to select more of the card to use). Because the “k” in week butts up against the right side of the journal card, it isn’t a completely formed letter. That’s easy enough to fix though. I used the polygonal lasso tool and selected the area of the letter that needed to be filled in. Using the clone tool, I sampled a bit of the letter color/pattern and brushed it over the lasso selection. Then, I deselected the marching ants that remained over the selection by using shortcut Control + D.
For “dearest” and “love” I changed the blend mode so the background of the journal cards blended into the paper layer below.
For “this week” I used the rectangular marquee tool, I selected the first word, right click and selected “layer via copy” to put the selected text on its own layer, then I went back to the journal card layer and repeated the process for the word “week”. By performing this on two separate layers, each word strip can be moved independently with the move tool.
Summer Lovin’ was a bit trickier as the text was a variety of light and dark tones so when following the same directions as I performed for “dearest” and “love”, some of the letters blended into the underlying layer more than I preferred (the M and O). It was an easy fix though. I changed the blend mode to “lighter” and then duplicated that layer and for that second layer, I changed the blend mode to multiply which darkened up the letters so that they stood out more.
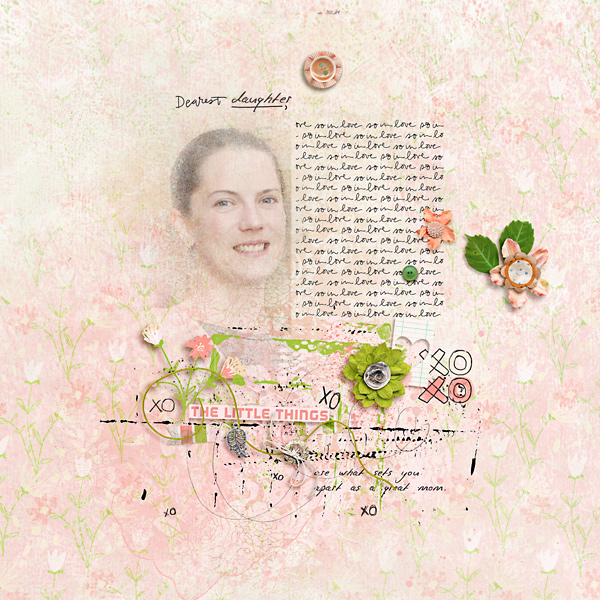
Here’s a layout I created, using the second technique of changing the blend mode. I used two journal cards, selecting “dearest” and the whole card of text from the other. The kit I used was I Choose You by Little Butterfly Wings.
I hope that I have inspired you to not only use your journal cards in their entirety but also look at the bits and pieces of them, and how they might be used in your layout design.
Leave a Reply